You know that feeling. You’ve finally upgraded to an adjustable bed base because your back demanded it, or maybe you just love reading in zero-gravity mode. It’s a game-changer for sleep quality. But then you look at your bedroom. It feels… incomplete. Cold. Like a hospital room waiting for personality. You miss your headboard. That beautiful, upholstered piece of furniture that tied the whole room together. So you try to slap it on the new frame, and disaster strikes. It wobbles. It leans. Or worse, it doesn’t fit at all.
It’s frustrating, isn’t it? You spent good money on comfort, but now you’re sacrificing aesthetics. The good news is, you don’t have to choose between a back-friendly mattress and a stylish bedroom. In 2026, the technology for connecting these two worlds has matured significantly. It’s not just about forcing bolts into holes anymore. It’s about understanding the mechanics of movement. An adjustable base moves; a headboard generally doesn’t. Bridging that gap requires the right hardware, specifically designed brackets that account for motion without sacrificing stability.
Let’s be real though. Most people think this is a simple DIY job. Grab a wrench, tighten some screws, done. But if you’ve ever had a headboard rattle every time you adjusted the incline, you know it’s trickier than it looks. The key lies in the brackets. Not just any brackets, but the right ones. Whether you are dealing with a bolt-on design or a hook-on system, getting this wrong can damage your frame or leave you with a lopsided look. We’re going to walk through exactly how to get it right, avoiding the common pitfalls that turn a weekend project into a headache.
Understanding the Mechanics of Motion
Before you even touch a screwdriver, you need to understand what’s happening under the hood. An adjustable bed base is a dynamic structure. It bends, lifts, and articulates. A traditional headboard is static. It wants to stay put. When you connect them, you are creating a tension point. If the connection is too rigid, the stress from the motorized movements can crack the wood of the headboard or strip the threads on the frame. If it’s too loose, you get that annoying wobble that drives you crazy every time you shift positions.
Most modern adjustable frames in 2026 come with pre-installed mounting points, but they aren’t universal. Some use a standard bolt pattern, while others rely on a specialized hook system. You need to check your specific model’s manual first. Don’t assume. Look for the metal plates or slots near the top of the head end of the base. These are your anchor points. If they aren’t there, don’t panic. Universal bracket kits are widely available now, designed to clamp onto the frame rails without drilling. This is a huge advancement from five years ago, where modification was often required.
The material of your headboard matters too. A heavy solid wood headboard puts more strain on the brackets than a lightweight fabric-covered one. If you have a heavy piece, you need brackets with a higher weight capacity and potentially more mounting points. Think of it like hanging a heavy mirror versus a small picture frame. You wouldn’t use the same hardware for both. Same logic applies here. Assess the weight and width of your headboard before buying any hardware. It saves you a trip back to the store later.
Choosing the Right Bracket Type
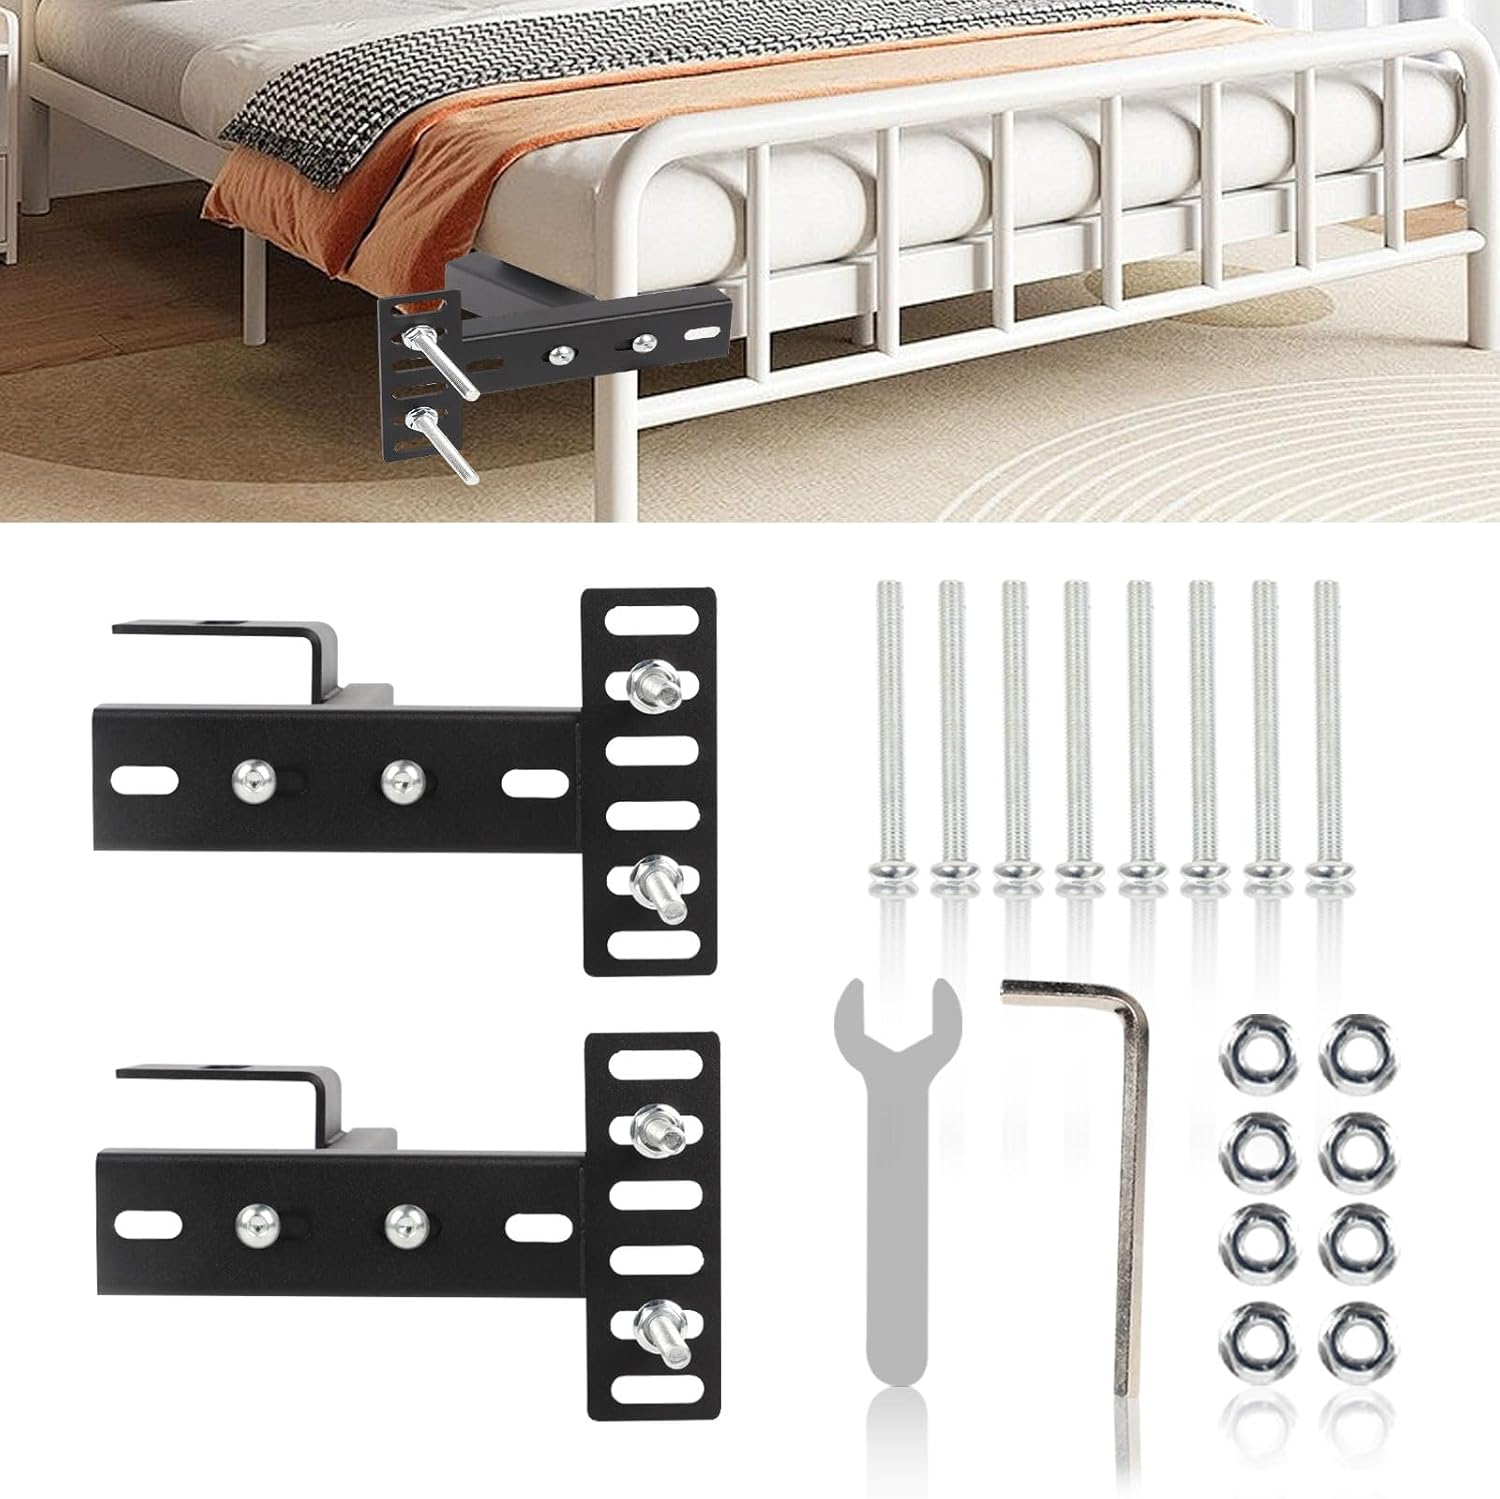
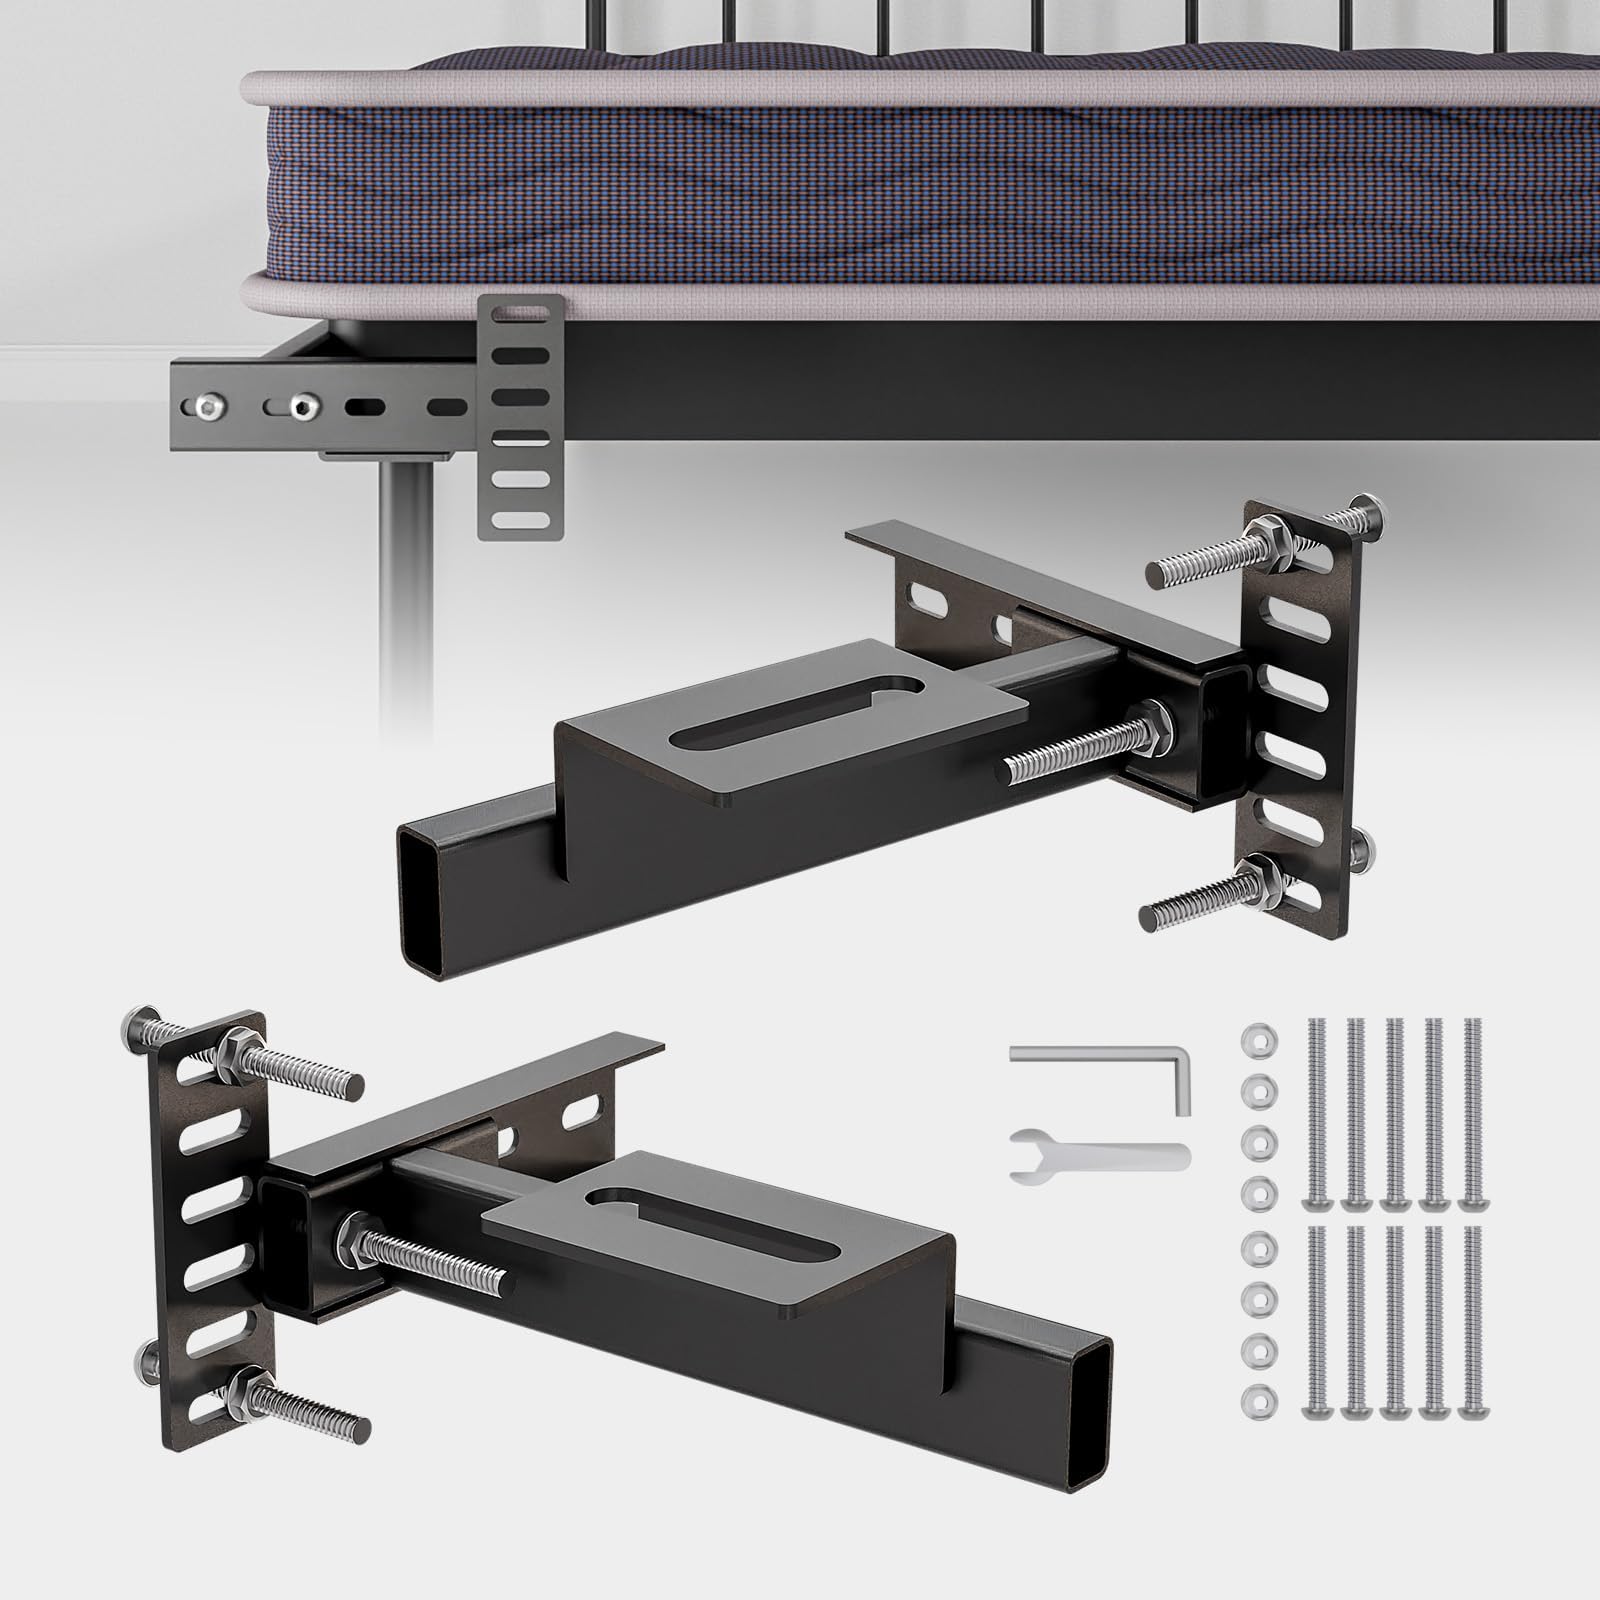
Not all brackets are created equal. In fact, using the wrong type is the number one reason for installation failure. There are two main categories you’ll encounter: bolt-on and hook-on. Bolt-on brackets are the most common. They involve screwing long bolts through the headboard legs and into the receiving holes on the adjustable base. They offer a very secure, rigid connection. However, they require precise alignment. If your headboard holes don’t line up perfectly with the base holes, you’re in trouble. This is where adjustable universal brackets shine. They have multiple slots or elongated holes that allow for slight adjustments in width and height.
Hook-on brackets, on the other hand, are becoming increasingly popular for their ease of use. Instead of threading bolts, you hang the headboard onto metal hooks attached to the base. It’s faster and often requires less tools. But here’s the catch: hook-on systems can sometimes allow for a bit more lateral movement. If you lean against the headboard hard, it might shift side-to-side. To counter this, many high-quality hook kits include locking pins or secondary stabilizers. Always look for these features if you go the hook route. They make a massive difference in long-term stability.
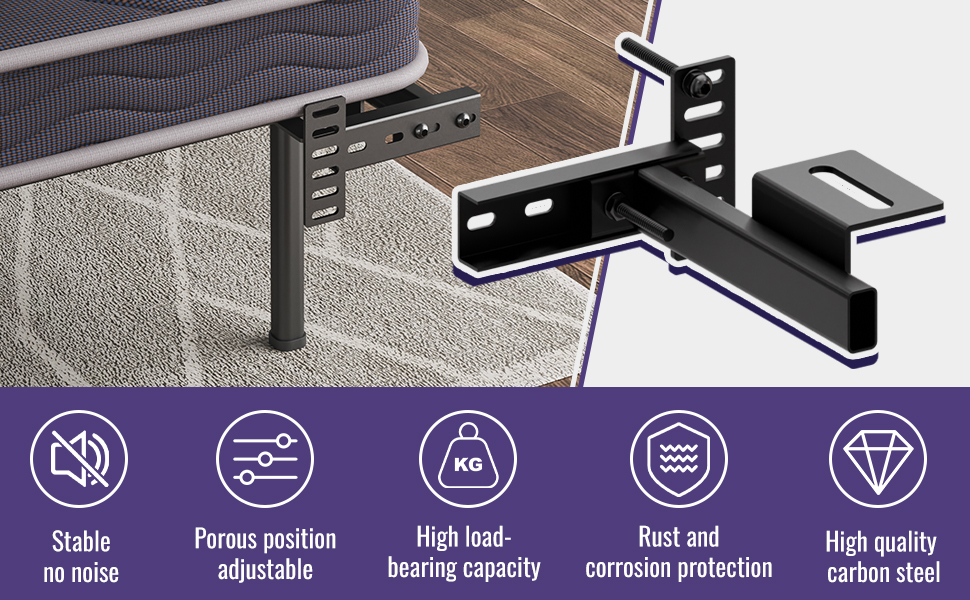
Then there are the universal clamp-style brackets. These are lifesavers if your adjustable base doesn’t have pre-drilled holes. They wrap around the metal frame rails and tighten down with set screws. They are incredibly versatile and work with almost any headboard style. The trade-off? They can be slightly bulkier and might be visible if your headboard legs are thin. But functionally, they are rock solid. In 2026, we’re seeing more hybrid designs that combine clamping mechanisms with bolt-on interfaces, giving you the best of both worlds. Check reviews for "wobble resistance" when shopping, as this is the true test of a bracket’s quality.
Precision Measurement and Alignment
Here is where most people mess up. They eyeball it. Don’t eyeball it. Measure twice, cut once, right? Well, measure three times here. Start by measuring the distance between the mounting holes on your headboard. Write that number down. Then, measure the distance between the mounting points on your adjustable base. Are they the same? Probably not. That’s okay. This is why you need those adjustable brackets mentioned earlier. You need to calculate the offset.
Next, consider the height. You want the headboard to sit at a comfortable level relative to your mattress. If it’s too low, it looks weird and offers no back support when sitting up. Too high, and it might interfere with wall outlets or look disproportionate. A good rule of thumb is to have the bottom of the headboard sit about 2-4 inches above the top of the mattress when the bed is flat. Mark this height on the wall or use a friend to hold the headboard in place while you check the alignment with the base brackets. Visualizing it before you drill is crucial.
Also, check for clearance. When the adjustable base raises the head section, does the headboard hit the wall? Does it interfere with any nightstands or lamps? Test the full range of motion of your bed before fully tightening everything. Raise the head to 90 degrees if possible. Watch for any contact points. If the headboard scrapes the wall, you might need spacers or shims to push the base slightly away from the wall. These small plastic or rubber discs are cheap but essential for protecting your paint and ensuring smooth operation. It’s a small detail that prevents big problems later.
Tools and Preparation for Success

You don’t need a professional workshop, but you do need the right tools. Trying to install headboard brackets with a dull screwdriver or a mismatched wrench is a recipe for stripped screws and frustration. At a minimum, you’ll need a socket wrench set, a Phillips head screwdriver, and a tape measure. A level is also highly recommended. Yes, a level. Even if the floor is uneven, you want the headboard to appear straight relative to the horizon, not the floor. Shims can help correct for uneven floors, but the headboard itself should be plumb.
Safety gear is often overlooked. Wear gloves to protect your hands from sharp metal edges on the brackets and frame. Adjustable bases are heavy. If you need to tilt the base to access underside mounting points, get help. Don’t try to lift a queen or king-sized base alone. It’s awkward and dangerous. Also, clear the area around the bed. You’ll be moving around, kneeling, and reaching. Having clutter in the way increases the risk of tripping or dropping tools onto your new mattress. Protect your investment by keeping the workspace clean.
Before starting, lay out all your parts. Identify the left and right brackets. They are often mirrored, so mixing them up can cause alignment issues. Check that you have all the necessary bolts, washers, and nuts. It’s surprising how often a single washer goes missing from the package. If something is missing, contact the manufacturer immediately. Don’t try to substitute with hardware from your junk drawer unless you are certain of the grade and size. Using inferior bolts can lead to failure under the stress of daily adjustment. Quality hardware costs a few dollars more but lasts for years.
Step-by-Step Installation Process
Alright, let’s get to work. First, position your adjustable base in its final location. Make sure it’s plugged in and tested to ensure it works properly before you add the weight of the headboard. Attach the brackets to the adjustable base first. If you are using bolt-on brackets, insert the bolts through the base’s mounting holes and secure them loosely with nuts. Do not tighten them completely yet. You need some wiggle room for alignment. If you are using clamp-on brackets, position them on the rails and tighten the set screws just enough to hold them in place but still allow for minor adjustments.
Next, bring in the headboard. This is definitely a two-person job. Have one person hold the headboard steady while the other aligns the headboard’s mounting holes with the brackets on the base. Insert the bolts or engage the hooks. If you are using a bolt-on system, thread the bolts through the headboard legs and into the brackets. Hand-tighten them initially. Check the level. Is the headboard straight? Adjust the position of the brackets on the base if necessary. Once everything looks aligned and level, you can start tightening the bolts. Use a crisscross pattern, similar to changing a tire, to ensure even pressure. Tighten gradually, checking the level after each quarter turn.
Finally, do the wobble test. Grab the headboard and give it a firm shake. Does it move? If yes, identify where the play is. Is it at the connection to the base? Tighten those bolts more. Is it within the headboard structure itself? That might be a manufacturing issue. Once it feels solid, test the adjustable base again. Run it through its full range of motion. Listen for creaks or clicks. If you hear grinding, stop and check for interference. Maybe a bolt is too long and hitting the motor housing. Trim it if needed. Once it runs smoothly and silently, you’re done. Stand back and admire your work. It should look seamless.
Even with careful planning, things can go wrong. The most common complaint is persistent wobbling. If you’ve tightened everything and it still shakes, the issue is likely gap tolerance. There might be a small space between the bracket and the headboard leg. Solution? Add rubber washers or felt pads. These fill the gap and dampen vibration. They act as shock absorbers, reducing the transfer of movement from the base to the headboard. It’s a simple fix that works wonders. Another option is to use thread-locking fluid on the bolts. This prevents them from loosening over time due to the constant vibration of the motor.
What if the headboard doesn’t line up with the base holes? This happens frequently with older headboards or non-matching sets. Don’t force it. You might need to drill new holes in the headboard legs. If you’re not comfortable doing this, take it to a local carpenter or handyman. It’s a quick job for them. Alternatively, use a universal adapter plate. These are metal plates with multiple pre-drilled holes that bridge the gap between mismatched patterns. They are inexpensive and widely available online. Just make sure the plate is thick enough to handle the stress.
Another issue is aesthetic mismatch. Sometimes the brackets are ugly and visible. If this bothers you, consider painting the brackets to match the headboard or the base. Spray paint designed for metal works well. Or, choose a headboard with wider legs that conceal the hardware entirely. In 2026, many manufacturers are designing "hidden" bracket systems that sit inside the headboard structure, leaving no visible hardware from the front. If you are buying new, look for this feature. It adds a premium look and eliminates the visual clutter of exposed metal. Remember, the goal is a cohesive look, not just a functional one.
So, there you have it. Attaching a headboard to an adjustable bed isn’t rocket science, but it does require attention to detail. It’s about respecting the mechanics of the bed and choosing hardware that complements rather than fights the movement. By understanding the types of brackets, measuring carefully, and taking your time during installation, you can achieve a result that is both beautiful and stable. No more wobbles. No more regrets. Just a cozy, stylish sanctuary that supports your body and your taste.
Don’t let the fear of complexity stop you from completing your bedroom vision. The tools are accessible, the knowledge is out there, and the satisfaction of a job well done is worth the effort. Take a deep breath, gather your tools, and tackle it step by step. And if you get stuck? Reach out. Online communities and customer support teams are usually happy to help. You’ve got this. Enjoy your new, fully integrated sleep setup. It’s going to look amazing.