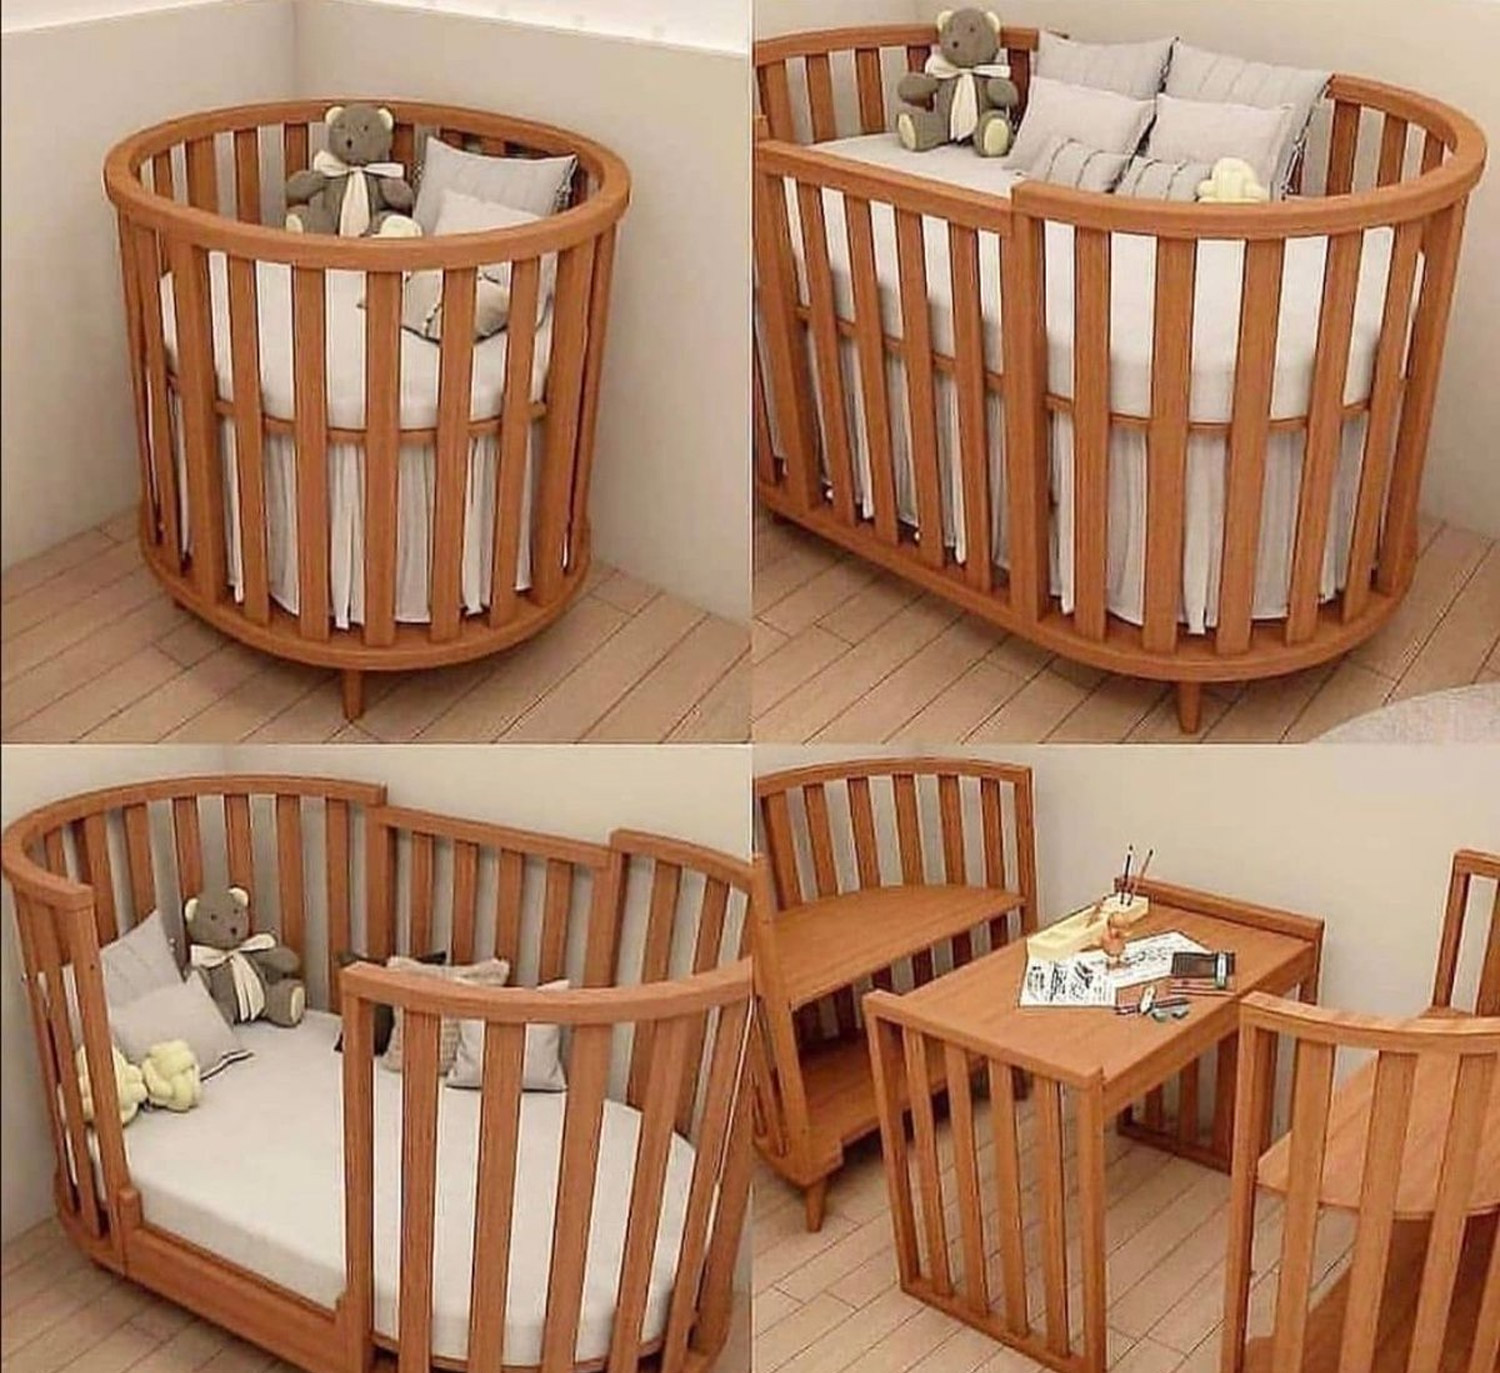
The nursery is quiet now, save for the rhythmic hum of a white noise machine and the soft, even breathing of a toddler who has officially outgrown the physical boundaries of an infant sleep space. If you have recently found your child testing the structural limits of their crib—perhaps by hooking a leg over the top rail or attempting a daring midnight escape—you are standing at a major parenting crossroads. The era of the crib is drawing to a close, and a new phase of furniture versatility is about to begin. Rather than hauling a costly piece of solid wood to the curb or letting it collect dust in the garage, savvy homeowners are turning to structural conversions.
Transforming nursery furniture into an adult-sized bed is a brilliant exercise in resourcefulness. Yet, walking down this path requires more than a simple wrench and a hopeful attitude. It involves understanding furniture engineering, navigating proprietary versus universal hardware, and adhering strictly to juvenile safety standards. When executed properly, a crib-to-twin conversion preserves the emotional history embedded in the nursery while delivering a reliable, full-length bed foundation that can easily serve a child all the way through their elementary school years.
Understanding the Anatomy of Convertible Furniture and Conversion Kits
The modern nursery market has evolved past the single-purpose wooden box of generations past. Today's standard convertible cribs are engineered from the ground up with future transitions in mind. When manufacturers design a 3-in-1 or 4-in-1 crib, they carefully calculate load distribution, panel thickness, and fastener placements so that the structural elements can be repurposed years down the line. The tall back panel of the crib is almost always meticulously measured and reinforced to eventually serve as the headboard of a twin bed, while the front or side rails are disassembled to free up vital components.
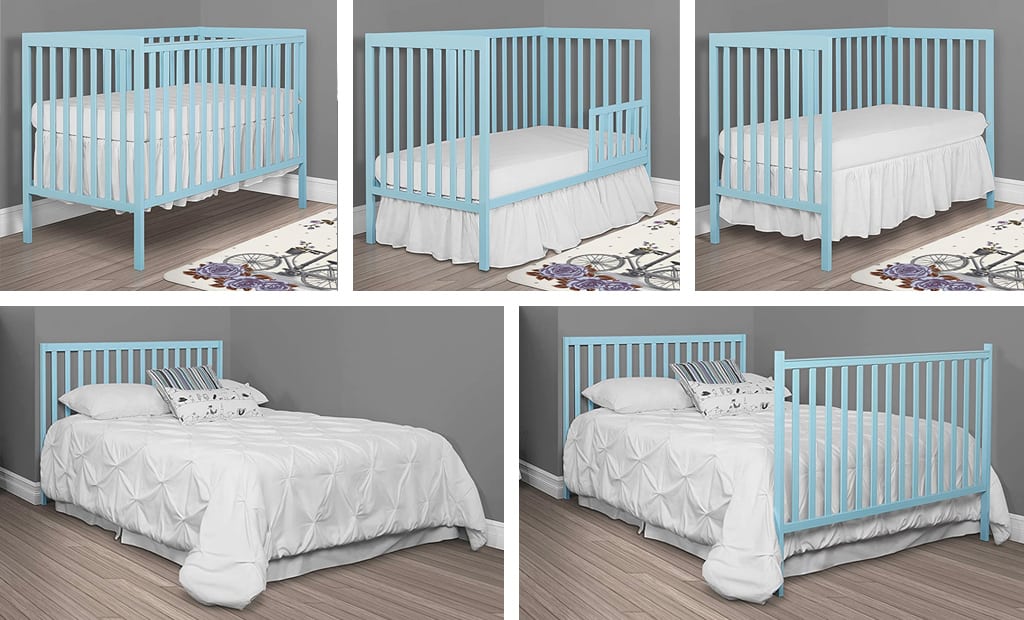
However, the transition from a 52-by-28-inch infant mattress footprint to a standard 75-by-38-inch twin mattress framework requires external mechanical support. This is where specialized conversion kits enter the picture. Brand-specific conversion kits consist of wooden side rails and cross-slats designed to match the exact stain, grain, and mounting brackets of your original crib model. Conversely, universal metal bed rails or conversion slats offer an adaptable alternative if the original manufacturer has gone out of business or no longer manufactures matching hardware. Understanding the distinction between these options dictates whether your finished bed looks like a cohesive piece of designer furniture or a mismatched DIY project.
Beyond the aesthetic alignment, structural integrity remains the paramount concern. An infant crib is designed to contain a lightweight baby under static load conditions, whereas a twin bed must accommodate a growing child, active play, bedtime reading sessions, and occasional parent cuddles. This means the connection points—specifically where the headboard meets the new side rails—must handle dynamic forces and shear stress effectively. Inspecting the thickness of the wood, checking for hairline cracks near pre-drilled bolt holes, and assessing the quality of the hardware provided in your kit will dictate the long-term safety of the finished piece.
Material composition plays an exceptionally vital role in how smoothly this project unfolds. Solid hardwoods like New Zealand pine, oak, maple, and birch hold up exceptionally well to repeated assembly and disassembly. Engineered woods, medium-density fiberboard (MDF), or low-grade particle board, on the other hand, can strip out easily when threaded bolts are removed and re-tightened after four or five years of storage. If your original nursery furniture utilized cam locks and dowels in high-stress areas, you may need to apply wood glue or reinforce structural joints with metal corner brackets to ensure absolute rigidity once the twin mattress is dropped into place.
Evaluating Safety Standards and Structural Integrity Before You Begin
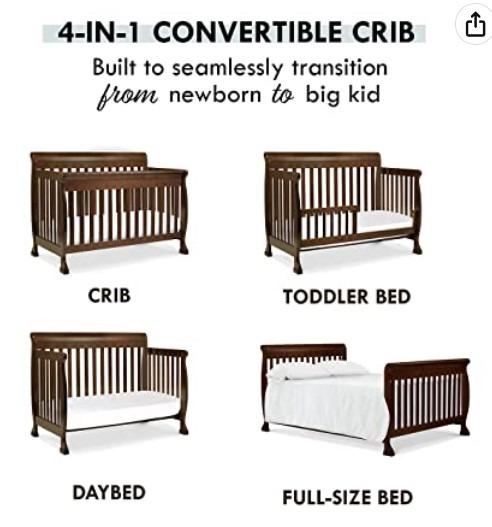
Before turning a single screw, a thorough safety audit of your existing nursery furniture is non-negotiable. Cribs undergo rigorous testing under organizations like the Juvenile Products Manufacturers Association (JPMA) and adhere strictly to Consumer Product Safety Commission (CPSC) guidelines. Once you strip away the drop-sides or fixed enclosures and open up the frame to a standard twin configuration, those infant-specific certifications no longer apply in the same way. You must shift your focus toward general youth bed safety, ensuring that the finished furniture piece meets or exceeds modern anti-tip and load-bearing expectations.
One of the most critical structural checkpoints involves examining the headboard mounting brackets. Over years of use, changes in household humidity and temperature can cause wooden components to warp or swell, misaligning pre-drilled holes by fractions of an inch. Force-fitting bolts into misaligned threaded inserts can strip the metal threads or crack the surrounding wood grain. If you notice any structural wobble in the back panel while it is still functioning as a crib, address those weak points with wood reinforcement dowels or structural adhesive long before you attempt to attach twin-size side rails.
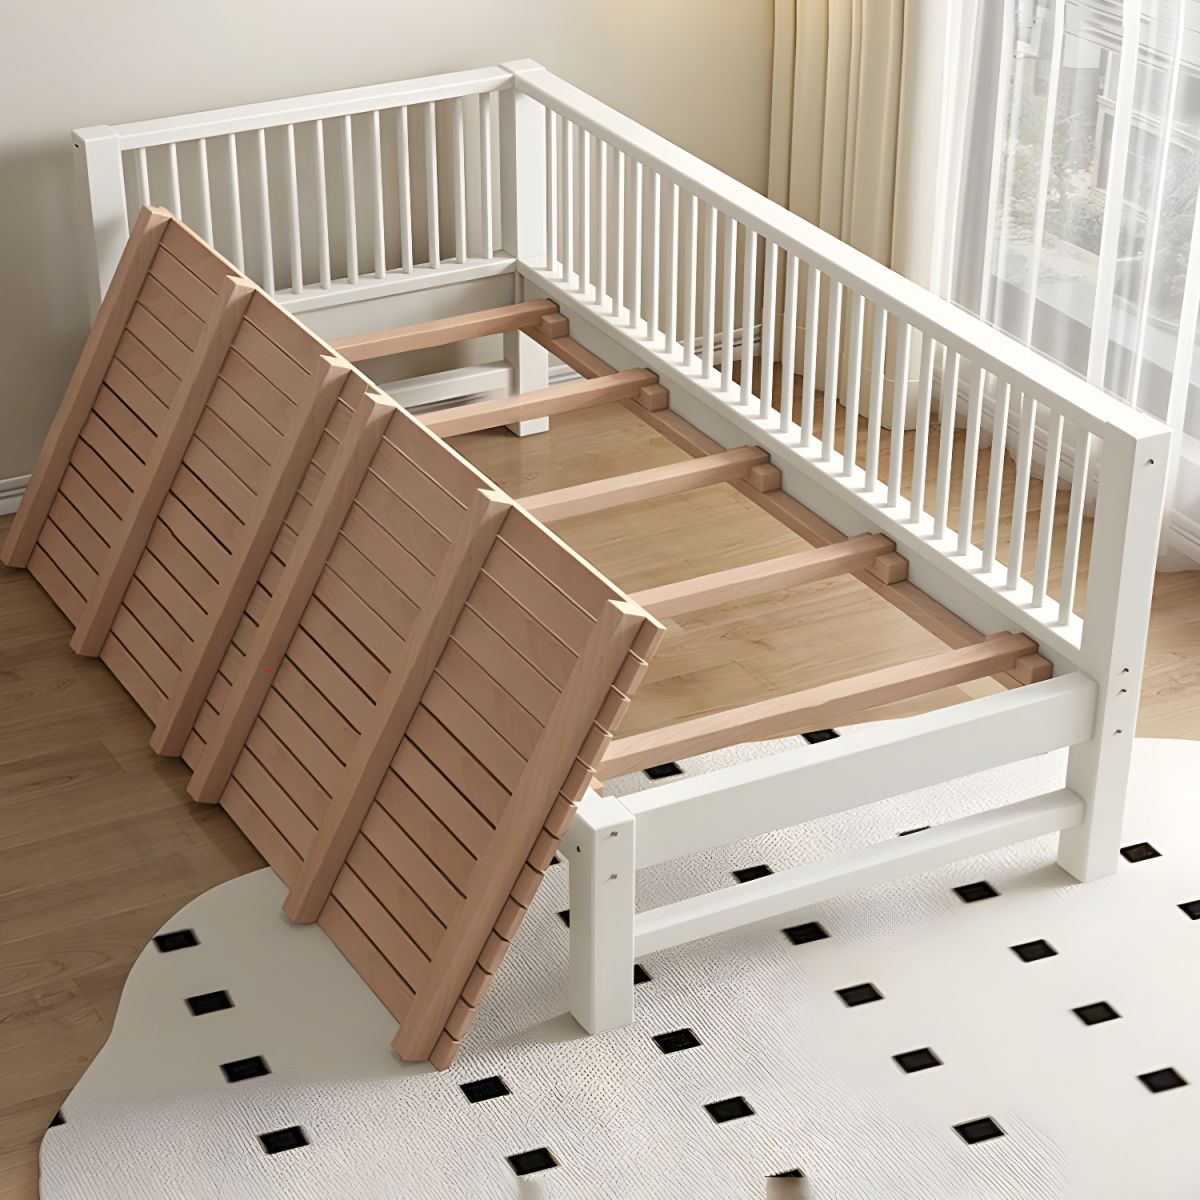
Bed height and clearance considerations also demand careful attention during the planning phase. Standard crib mattresses sit low to the ground, minimizing fall risks for infants who are just learning to sit or pull themselves up. A twin mattress paired with a standard box spring or wooden slat foundation instantly elevates the sleeping surface significantly higher. For younger toddlers making the leap straight to a twin bed, you must evaluate whether a low-profile foundation or bunkie board is necessary to keep the fall distance manageable, or if supplemental portable bed rails should be installed along the open sides during the first few months of adaptation.
Furthermore, compliance with modern non-toxic finishes and hardware standards cannot be overlooked, especially if the crib was purchased secondhand or handed down through multiple family members. Check recall databases for your specific crib brand and model year to ensure no latent structural defects exist. Modern conversion kits must feature smooth, rounded edges, recessed fastener heads to prevent clothing snags or scratches, and durable finishes free from harmful heavy metals or volatile organic compounds (VOCs). Taking these preventative steps ensures that your economical furniture upgrade never compromises your child's physical safety.
Step-by-Step Practical Implementation Guide for a Flawless Bed Conversion
Executing a clean, professional-grade crib-to-twin conversion requires patience, an organized workspace, and the right set of hand tools. Rushing through the disassembly or misplacing proprietary hardware will only lead to frustration and structural instability. Follow this structured methodology to transform your nursery focal point into a sturdy youth bed with absolute confidence.
Common Pitfalls and Field-Tested Workarounds During the Transition
Even with meticulous planning, DIY furniture modifications often present unforeseen challenges. Anticipating these hurdles allows you to pivot quickly without compromising the safety or aesthetics of the finished bed. Here are the most frequent pitfalls encountered during crib-to-twin conversions and the proven practitioner workarounds used to solve them.
Holistic Perspectives on Furniture Upcycling and Long-Term Value
Embracing a crib-to-twin conversion goes far beyond simple household economics or weekend project satisfaction; it represents a meaningful shift toward sustainable domestic consumption. In an era dominated by flat-pack furniture designed for short-term utility and eventual disposal, high-quality nursery furniture represents an anchor of solid craftsmanship. By choosing to adapt and extend the lifespan of these heavy hardwood pieces, families actively reduce furniture waste sent to municipal landfills while retaining items imbued with sentimental family history.
From a financial standpoint, the math is overwhelmingly favorable. Premium solid-wood cribs represent a substantial initial investment in nursery preparation. Purchasing a brand-new youth bed frame alongside a matching headboard duplicates that capital expense unnecessarily. Investing in a $50 to $150 conversion kit unlocks an adult-sized bed foundation for a fraction of retail cost, leaving more room in the family budget for quality mattresses, ergonomic bedding, and room accessories that adapt as the child matures into their adolescent years.
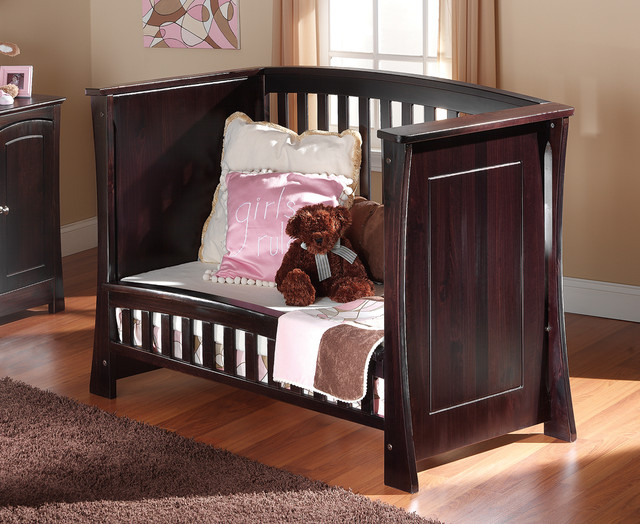
Moreover, psychological continuity plays an underappreciated role in childhood development. Transitioning from a confining infant crib to a vast twin bed can occasionally trigger mild sleep anxiety or bedtime resistance in sensitive children. Retaining the familiar visual anchor of their original nursery headboard—complete with the same wood grain, color tone, and subtle contours they have stared at since infancy—provides a comforting bridge of familiarity. This visual continuity eases the emotional friction of the milestone, fostering a sense of security in their newly expanded personal space.
Related Posts
Bedroom furniture ideas that make small spaces feel calmer and more useful
Understanding joinery and materials before you commit to a floating design

Navigating Regional Styles From Provence to Paris When Designing Your French Bedroom

Building a Peaceful Bedroom Environment Through Better Furniture Planning Methods
Navigating the Difference Between Flush Stitched Edges and Standard Pillow Tops
Understanding Air Valve Types to Prevent Leaks During Setup
Finally, mastering this conversion process builds foundational home-improvement literacy that pays dividends across future household projects. Working with structural fasteners, torque distribution, squaring frames, and finish matching instills practical confidence. Parents who successfully navigate the mechanical nuances of reinforcing a bed frame find themselves far more equipped to tackle subsequent bedroom upgrades, custom shelving installations, and general home maintenance challenges with calm competence.
Actionable Recommendations and Key Frameworks for Success
To ensure your crib-to-twin transition yields a durable, aesthetically pleasing, and completely safe sleeping environment, keep a few golden rules front and center. Treat the project not as a temporary hack, but as a permanent bedroom furniture installation that must withstand years of active nightly use.
Standing back to admire a sturdy, beautifully converted twin bed where an infant crib once stood is a quietly profound parenting moment. It serves as a tangible reminder of how swiftly time moves within the walls of a child's bedroom, transforming helpless infancy into independent childhood almost overnight. That piece of furniture, once tasked with keeping a fragile sleeper safe behind stationary wooden bars, now stands open and welcoming, ready to support years of bedtime stories, restless growth spurts, and peaceful slumber.
By approaching this conversion with technical precision, respect for safety standards, and careful attention to structural detail, you have successfully merged sustainability with smart household economics. The bed you built today will weather the remaining years of early childhood, holding fast through countless pillow forts, energetic leaps, and quiet moments of connection. As your child continues to grow and your home evolves alongside them, the skills and resourcefulness you applied here will remain ready for the next chapter of family life.
