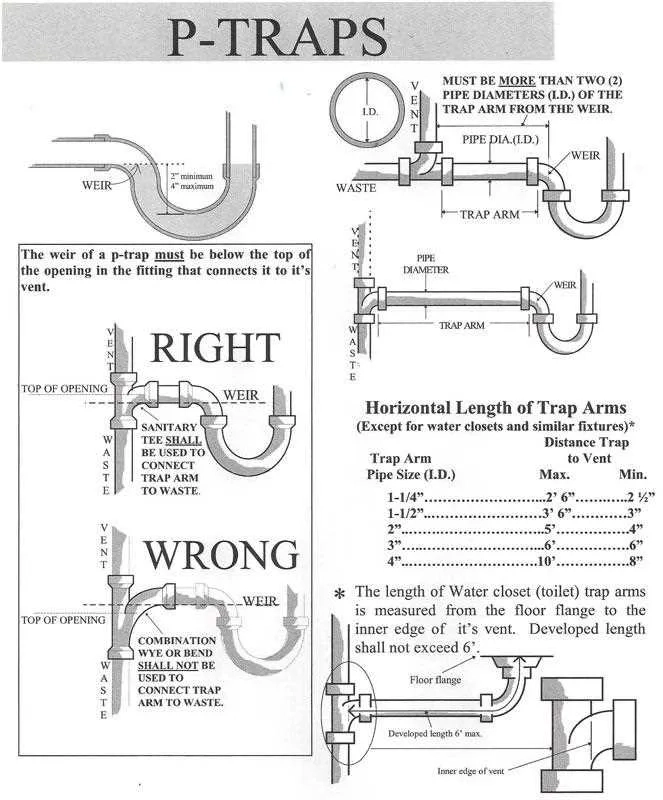
When it comes to bathroom plumbing, few components are as crucial yet often overlooked as the P-trap. These small but mighty fixtures play a vital role in preventing sewer gases from entering your home while keeping water from backing up. But when you're dealing with chrome finish P-traps, there's a whole new level of sophistication and care required.
P-traps might seem like simple plumbing accessories, but they're actually engineering marvels that deserve proper attention. When you're working with chrome finish P-traps specifically, you're dealing with a combination of functionality and aesthetics that requires both skill and understanding. Whether you're tackling a DIY project or managing routine maintenance, knowing how to properly install and care for these fixtures makes all the difference. The chrome finish adds a touch of elegance to any bathroom, but it also demands special consideration to keep it looking pristine while functioning flawlessly.
Understanding Chrome Finish P-Traps
Chrome finish P-traps are more than just plumbing hardware – they're design elements that elevate your bathroom's overall appearance. These traps feature a shiny, reflective surface that mimics the look of polished chrome, giving them a sophisticated and modern appeal. The chrome coating is typically applied through electroplating processes that create a durable, corrosion-resistant layer over the underlying metal, usually brass or stainless steel.
The key advantage of chrome finishes lies in their ability to resist tarnishing and maintain their luster over time. Unlike traditional brass or silver finishes that may develop patinas, chrome maintains its bright, clean appearance. This makes them particularly popular in contemporary bathrooms where a sleek, minimalist aesthetic is desired. However, this beauty comes with certain responsibilities – the chrome coating requires specific care to prevent scratches, discoloration, and premature wear.
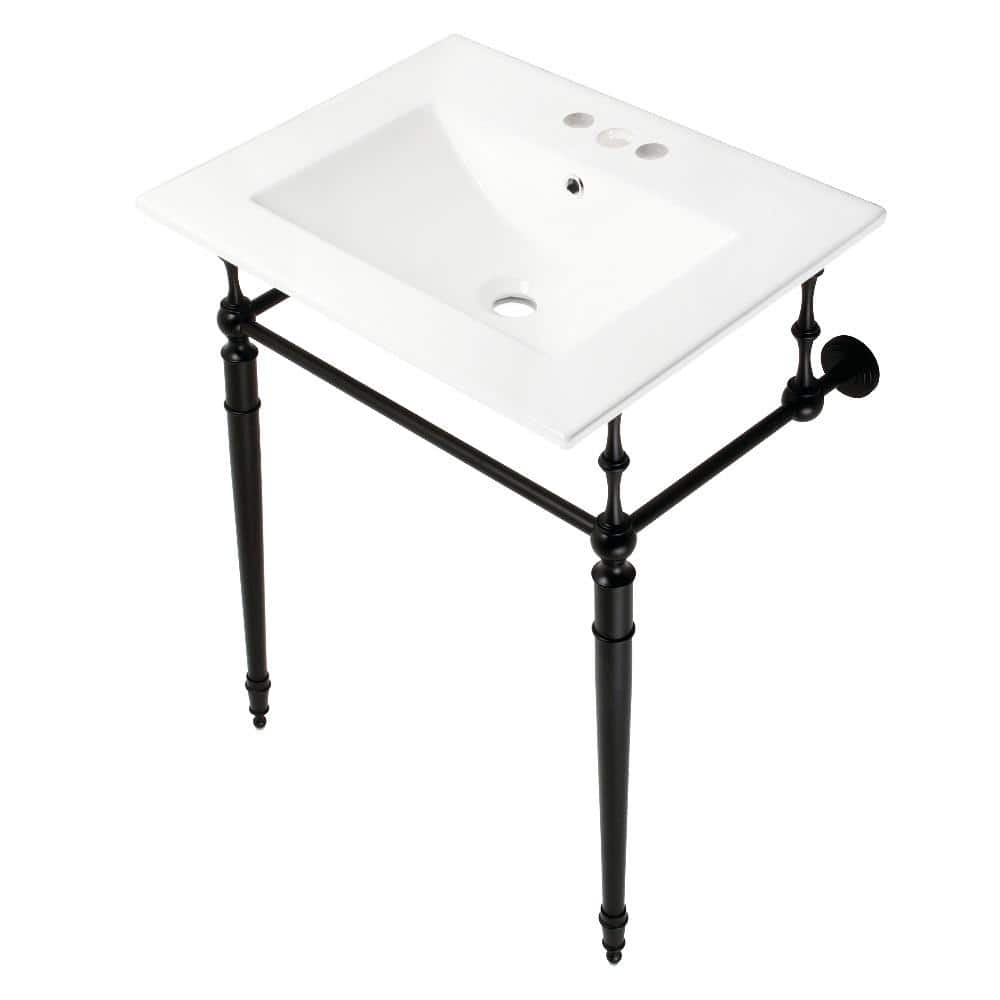
These traps typically come in various configurations including standard straight-through designs and more complex curved versions. The chrome finish is applied to the exterior surfaces, creating a uniform shine that reflects light beautifully. When properly installed and maintained, chrome finish P-traps can last decades while providing reliable leak prevention and odor control.
Essential Tools and Materials
Before diving into installation, gathering the right tools is crucial for success. You'll want to have a few essential items ready:
• Adjustable wrench or pliers • Pipe cutter or hacksaw • Teflon tape or pipe thread compound • Plumber's grease • Measuring tape • Level • Safety glasses • Work gloves
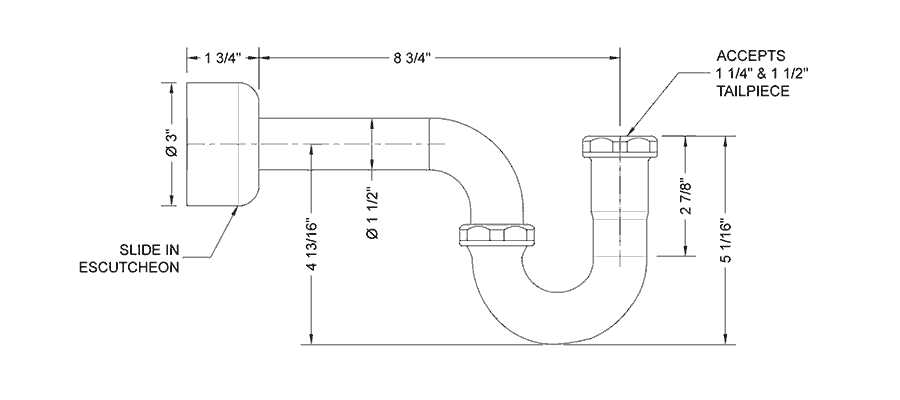
For materials, you'll need the P-trap itself, which should match your existing plumbing dimensions. Check that the trap's inlet and outlet ports align with your drainpipe sizes. Also consider having a spare set of washers and O-rings on hand, as these components are prone to wear over time.
The quality of your chrome finish P-trap matters significantly. Look for products from reputable manufacturers that offer warranties. Some traps come with additional features like anti-siphon mechanisms or improved sealing capabilities. Price points vary considerably, so balance your budget with the durability and performance you require.
Don't forget to verify that your local plumbing codes allow for the type of P-trap you plan to install. Some areas have specific requirements for bathroom drainage systems, particularly regarding materials and installation methods.
Step-by-Step Installation Process
Installation begins with careful measurement and preparation. First, turn off the water supply to the fixture and disconnect the old trap if replacing one. Remove the old trap by loosening the slip nuts connecting it to the drainpipe and the waste line. Take note of the orientation and any washers or gaskets that need replacement.
Next, measure the space between the drainpipe and the wall to ensure proper clearance for your new P-trap. The trap should fit comfortably without forcing connections. Clean the threads of the pipes thoroughly before proceeding.
Apply a thin layer of plumber's grease to the rubber gaskets and O-rings. This helps create a better seal and makes future removal easier. Thread the P-trap's inlet into the drainpipe, ensuring it's aligned properly. Tighten using appropriate tools, but don't overtighten – this can damage the chrome finish or crack the trap body.
Attach the other end to the waste line, making sure everything lines up correctly. Use a level to verify the trap sits evenly. The entire assembly should create a smooth, continuous curve without sharp angles that could trap debris.
Finally, test the installation by turning the water back on slowly. Check for any leaks around the connections. If everything looks good, run water through the system and observe for proper drainage.
Common Installation Mistakes to Avoid
Even experienced plumbers can fall into certain traps during P-trap installation. One major mistake is over-tightening fittings. While you want secure connections, excessive force can crack the chrome coating or damage internal components. Remember, a good seal doesn't require brute strength.
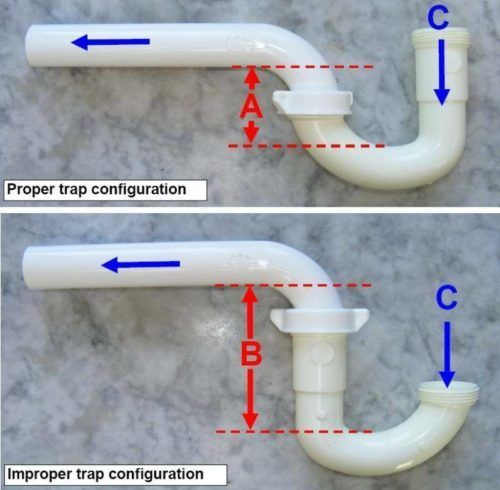
Another common error is improper alignment. If the trap isn't positioned correctly, it can cause drainage issues or create stress points that lead to leaks later. Always double-check measurements before beginning installation.
Many people forget to use adequate sealing compounds. Teflon tape alone might not provide sufficient protection against water infiltration. Applying plumber's grease to gaskets and threads creates an additional barrier that's essential for long-term reliability.
Ignoring the importance of proper clearance is another frequent oversight. The trap needs enough room to function effectively and allow for future maintenance access. A poorly positioned trap can become difficult to service and may interfere with adjacent fixtures.
Finally, failing to account for expansion and contraction can cause problems over time. Flexible connections help accommodate movement in the plumbing system, preventing stress on the chrome finish and maintaining structural integrity.
Maintenance Routine for Longevity
Regular maintenance is the secret to keeping chrome finish P-traps looking their best. Start with monthly visual inspections to check for signs of wear or corrosion. Look for any discoloration, scratches, or mineral buildup that might indicate issues requiring attention.
Clean the trap regularly using mild soap and water. For stubborn deposits, a mixture of baking soda and vinegar can work wonders. Apply the solution, let it sit for several minutes, then scrub gently with a soft brush. Rinse thoroughly afterward.
Avoid harsh chemicals that could damage the chrome coating. Bleach and ammonia-based cleaners are particularly problematic as they can cause etching or dulling of the finish. Stick to gentle, pH-neutral cleaning solutions.
Check all connections periodically for tightness. Loose fittings can lead to leaks and may cause stress on the chrome finish over time. Tighten carefully using appropriate tools.
Consider periodic lubrication of moving parts. Applying a small amount of silicone-based lubricant to the sliding components can help prevent sticking and maintain smooth operation.
Troubleshooting Common Issues
Even with proper installation and maintenance, P-traps can encounter problems. Slow drainage often indicates clogging within the trap or connected pipes. Try using a plunger first, then consider disassembling the trap for deeper cleaning. Be careful not to lose any small parts during this process.
Unusual noises coming from the trap usually signal air pockets or loose components. Check that all connections are secure and that the trap isn't vibrating against surrounding structures. Sometimes adding a small amount of water to the trap can help eliminate air bubbles.
Persistent leaks typically point to worn gaskets or improperly tightened connections. Replace any damaged seals immediately. If you notice water pooling around the trap area, it's time to investigate further.
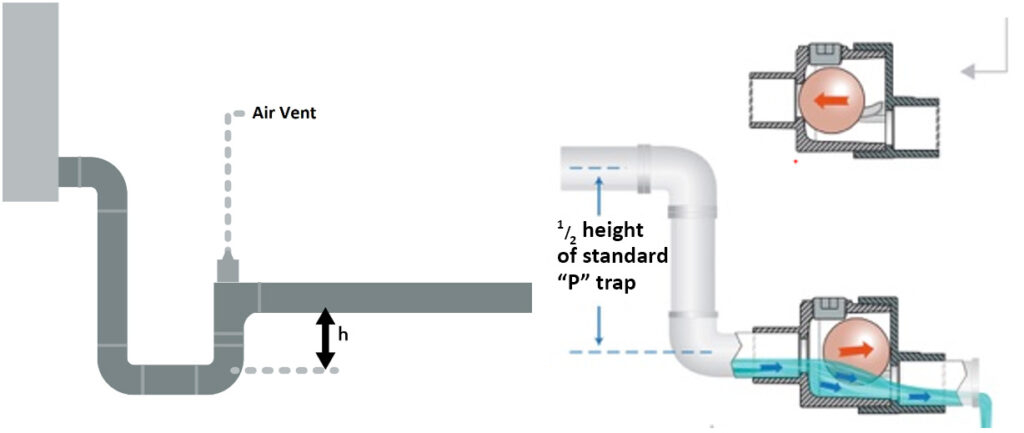
Odor issues can arise from dried-out trap seals or improper installation. A well-functioning P-trap should maintain a water seal that prevents gases from escaping. If odors persist, check that the trap is properly seated and that no gaps exist in the connections.
If you experience recurring problems, consider consulting a professional plumber. Sometimes underlying plumbing issues beyond the trap itself may be contributing to ongoing difficulties.
Installing and maintaining chrome finish P-traps effectively requires a combination of technical knowledge and attention to detail. These fixtures represent more than just plumbing hardware – they're part of your bathroom's overall design aesthetic. When properly installed and cared for, chrome finish P-traps can serve you faithfully for many years while maintaining their attractive appearance.
The key is approaching each step methodically, from initial planning through final inspection. Take time to select quality materials, follow proper installation techniques, and establish a regular maintenance routine. Remember that small investments in proper care today can prevent costly repairs tomorrow.
Whether you're tackling a simple replacement or installing new fixtures, understanding these principles will help you achieve professional-quality results. The chrome finish adds beauty to your bathroom, but it's the proper installation and ongoing care that ensures both performance and longevity. With patience and attention to detail, anyone can master the art of chrome finish P-trap installation and maintenance.
Related Posts
How Ceramic Vessel Sinks Enhance Bathroom Aesthetics and Functionality
How to Choose the Right Wall Mounted Corner Sink for Your Bathroom Space
Design and Durability Analysis of the Kingston Brass GLTS37225 Brushed Basin
Transforming Your Bathroom with Textured Stone Surfaces
Choosing the Perfect Small Undermount Sink for Your Home Decor