I was so confident in my DIY plumbing skills that I decided to install a WS bath sink myself. Let me just say, the $800 repair bill later taught me a hard lesson about bathroom plumbing basics. I remember thinking I had everything figured out until I realized I'd missed a critical connection that would cost me more than I'd budgeted for.
WS bath sinks are popular because they're stylish and space-efficient, but they can be tricky when you're not familiar with the installation requirements. After three years of doing home renovations, I've seen enough sink installations go wrong to know exactly what to look for. What makes WS sinks particularly challenging isn't just their design—it's the specific connections and measurements that can make or break your project.
Why WS Bath Sinks Matter for Home Projects
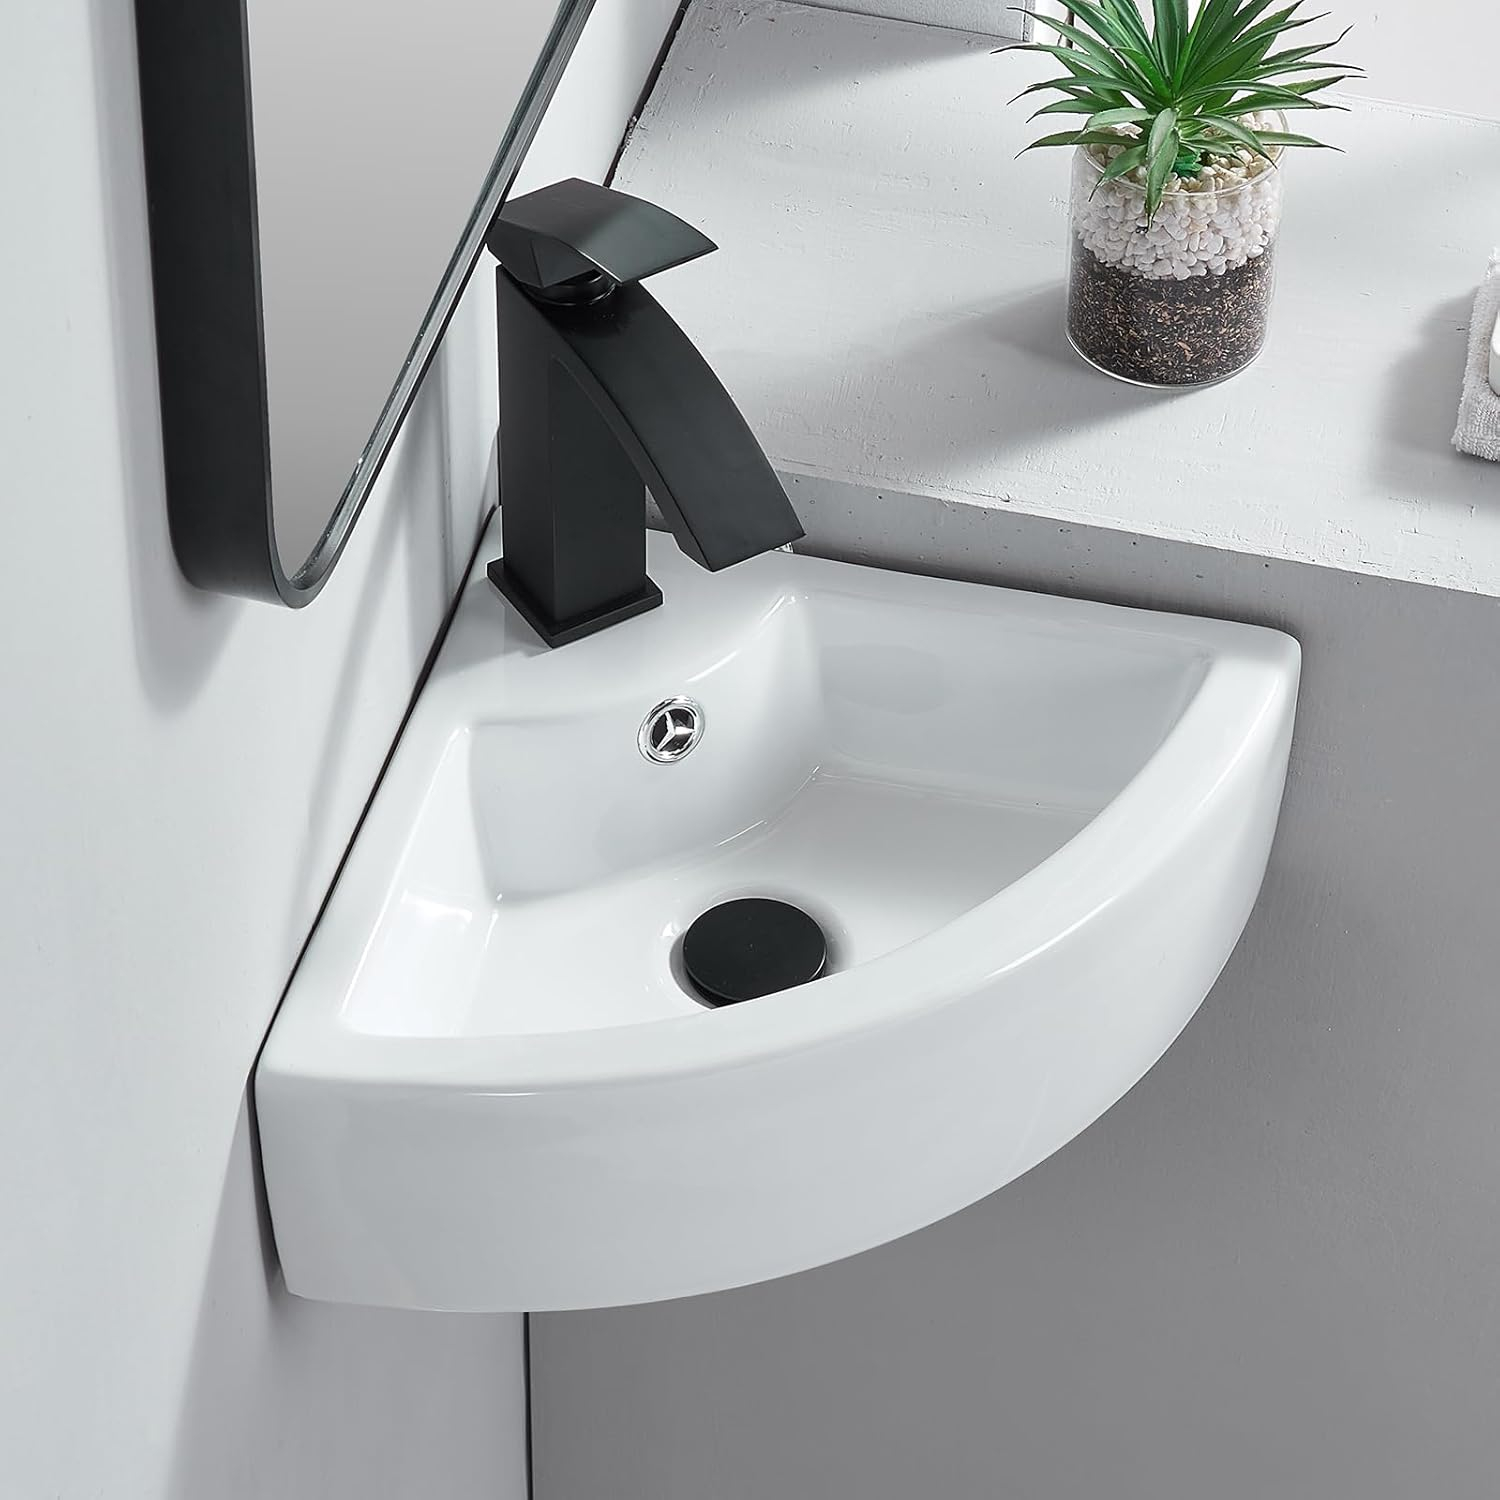
WS bath sinks offer a sleek, modern look that many homeowners crave. They're especially great for smaller bathrooms where you want to maximize space. But here's what most people don't realize: these sinks require precise installation to work properly. I've seen too many people rush through the process and end up with leaks, improper drainage, or even damage to the surrounding fixtures. The key is understanding that these aren't just any old sink—they have specific plumbing requirements that can't be ignored.
How I Approach WS Bath Sink Installations
When I tackle a WS bath sink project, I always start by measuring twice and cutting once—literally. First, I check the existing plumbing layout to make sure there's room for the new sink. Then I verify that the water supply lines match the sink's connection points. The biggest thing I learned is that you can't just rely on the manufacturer's instructions—you have to understand what's happening in your specific space. I usually spend extra time checking the P-trap setup and ensuring all connections are tight before calling it complete.
The Mistakes I Made with WS Bath Sinks
Here's the real kicker: I completely overlooked the importance of the drain assembly. I thought I could just connect the waste line directly to the P-trap, but that's not how it works with these particular models. When I finally discovered the problem, I had to remove the entire sink to fix the alignment issue. It took me three hours and cost me $800 to get it right. That's why I now always double-check the drain configuration before making any connections. Also, I never skip the silicone sealant anymore—it's crucial for preventing leaks around the sink base.
What Most People Get Wrong About WS Bath Sinks
Most people assume that since these are standard bathroom sinks, they'll install the same way. That's a big misconception. The real issue is the mounting system—the way the sink sits against the countertop and connects to the plumbing. I've seen people install them without proper support, which leads to cracking or misalignment. And yes, it's true that some models come with special adapters or gaskets that aren't obvious in the instruction manual. The takeaway? Don't trust the manual alone. Check the product specifications and see what other users are saying about compatibility issues.
Choosing the Right WS Bath Sink for Your Space
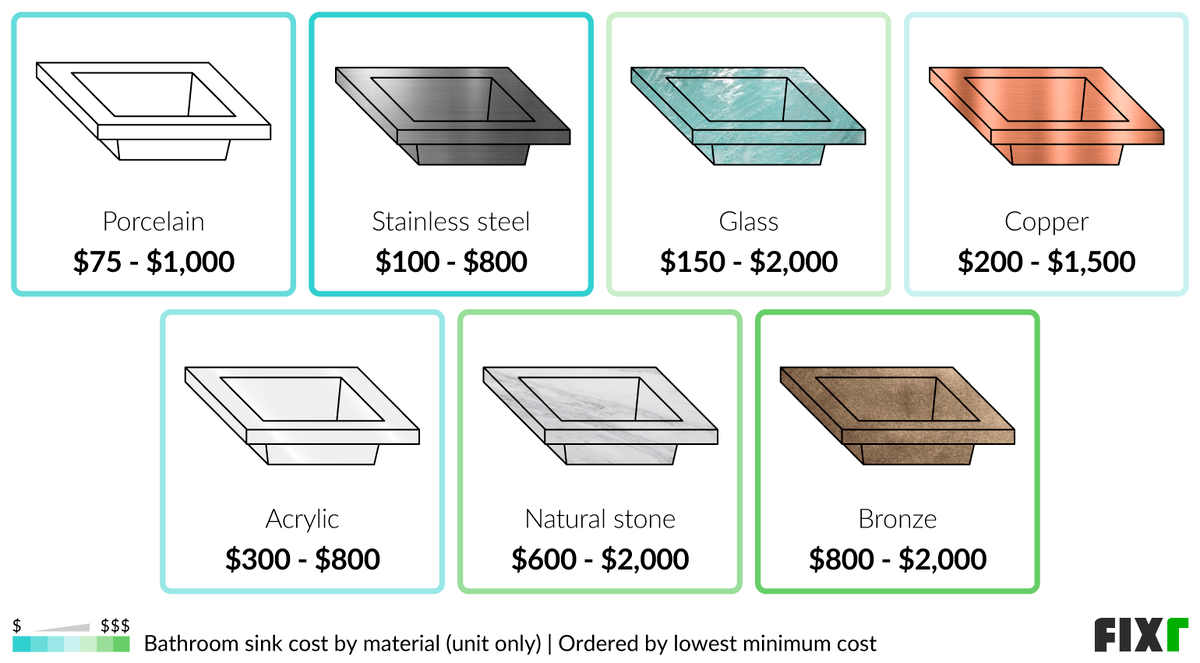
Picking the right WS bath sink depends on a few key factors. Size matters—measure carefully before buying. The depth of your vanity and the clearance needed for the faucet also play a role. I've found that the best approach is to look at both the sink dimensions and the installation requirements. For example, some models require a specific type of mounting bracket or additional reinforcement. I've learned to always check reviews from people who've installed in similar spaces to mine. It's not just about aesthetics; it's about compatibility with your existing setup.
Frequently Asked Questions About WS Bath Sink Installation
• Can I install a WS bath sink myself?
Yes, but it requires attention to detail. If you're not confident in your plumbing skills, it might be worth hiring someone.
• What tools do I need?
Basic plumbing tools like wrenches, a screwdriver set, and a utility knife. A level is also helpful for ensuring the sink sits flat.
• How do I prevent leaks?
Always use silicone caulk around the sink base and make sure all threaded connections are properly tightened.
• Are there specific drain requirements?
Yes, check the manufacturer's specs for the correct drain size and configuration.
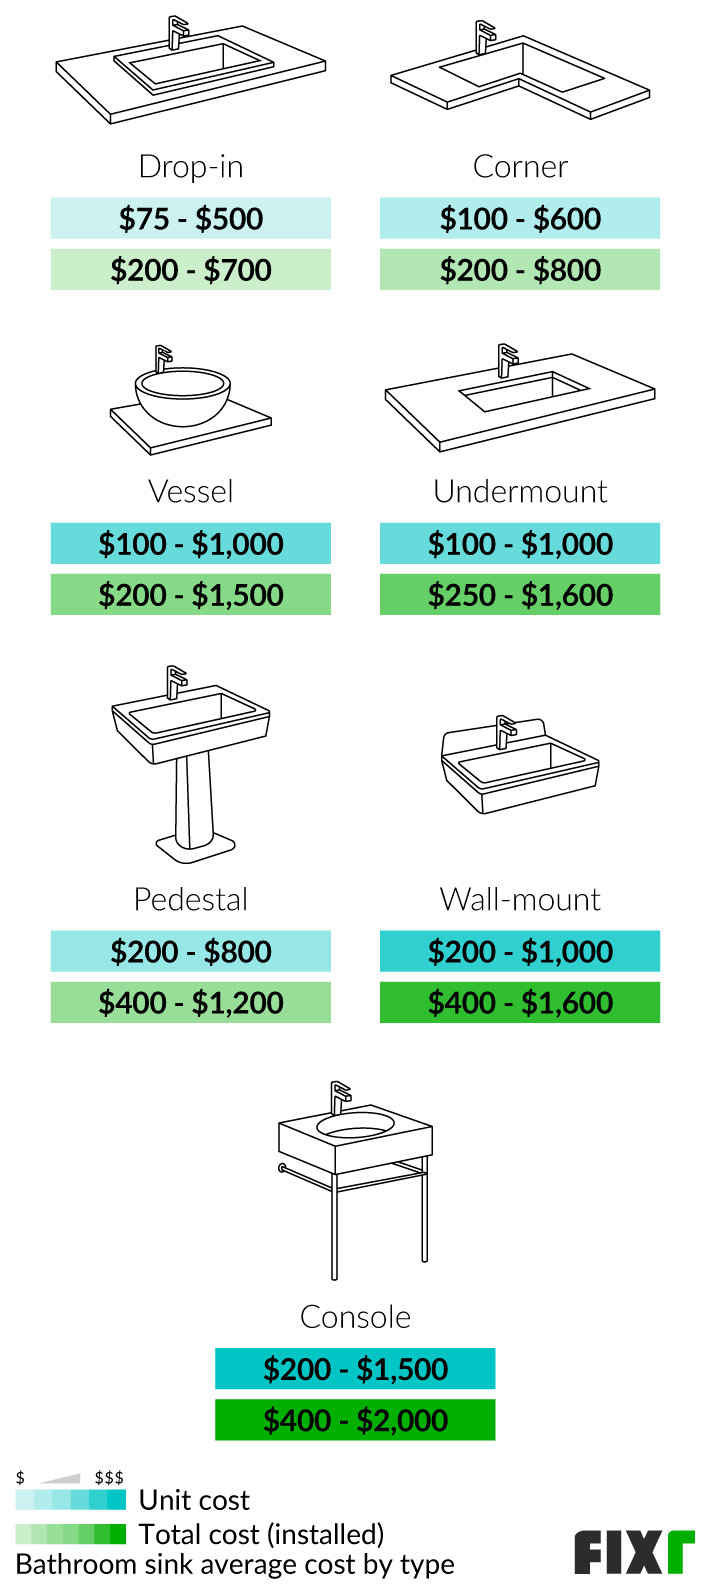
• How much does it cost to fix a bad installation?
Depending on the issue, it can range from $100 to $800, as I learned the hard way.
Looking back, I wish I'd taken more time to understand the installation specifics before starting. The $800 repair bill was a painful reminder that rushing through bathroom projects often costs more in the end. My advice? Invest in a good quality sink and take the time to read all the installation notes thoroughly. If anything seems unclear, don't hesitate to contact the manufacturer or consult a professional. Trust me, it's better to be safe than sorry when it comes to plumbing. Next time, I'm definitely getting help with the drain assembly setup—I've learned my lesson.


Related Posts

How Ceramic Vessel Sinks Enhance Bathroom Aesthetics and Functionality
How to Choose the Right Wall Mounted Corner Sink for Your Bathroom Space
Design and Durability Analysis of the Kingston Brass GLTS37225 Brushed Basin

Transforming Your Bathroom with Textured Stone Surfaces
Choosing the Perfect Small Undermount Sink for Your Home Decor