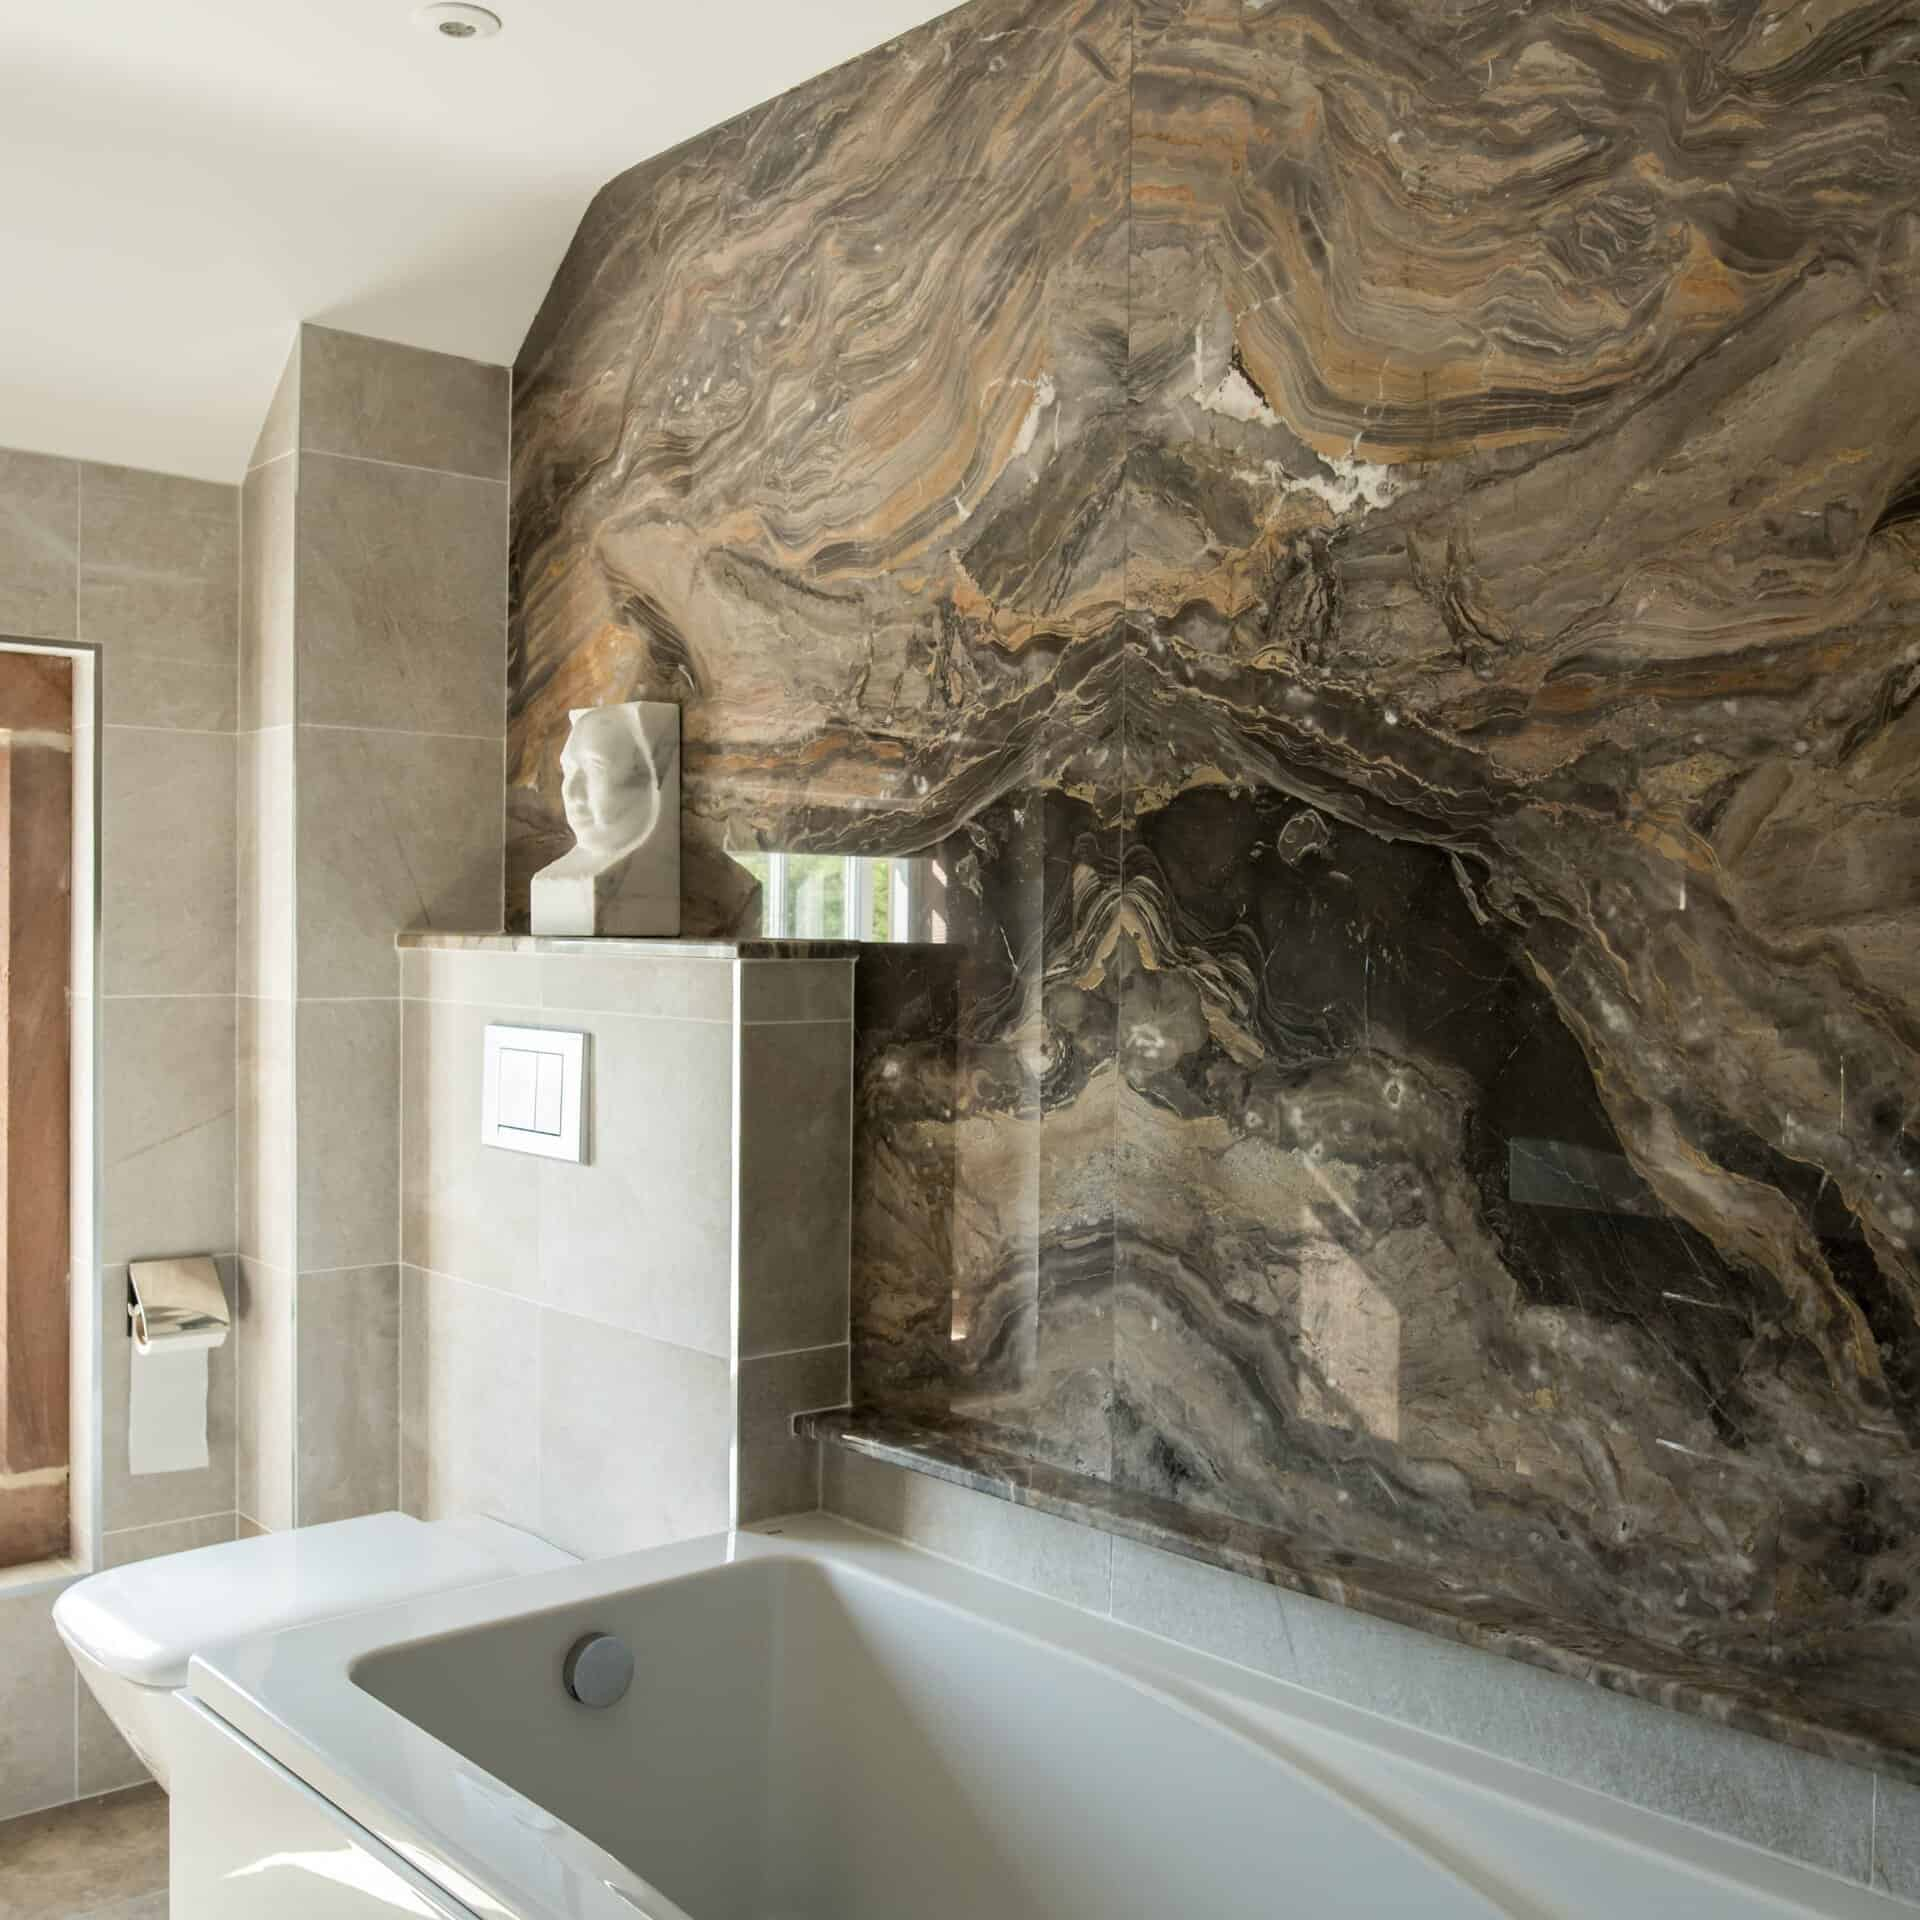
Tan brown granite vanity surfaces bring warmth and sophistication to any bathroom space. These beautiful countertops combine natural elegance with durability, making them a popular choice for homeowners seeking both style and function. However, installing these surfaces requires careful planning and attention to detail. This comprehensive guide will walk you through every step of the installation process, ensuring you achieve professional-quality results.
When it comes to bathroom renovations, few materials command as much respect as granite. Tan brown granite vanity surfaces offer a perfect blend of natural beauty and practicality. The warm, earthy tones create an inviting atmosphere while the stone's durability ensures years of reliable service. But before you can enjoy the aesthetic benefits, you'll need to master the installation process. Whether you're a seasoned DIY enthusiast or someone tackling their first major renovation project, understanding the fundamentals of granite vanity installation is crucial. The good news? With proper preparation and following the right steps, even beginners can achieve impressive results.
Understanding Tan Brown Granite Properties
Tan brown granite isn't just another countertop material – it's a natural wonder with unique characteristics that affect how it's installed. This particular granite variety features warm undertones that range from light beige to rich chocolate browns. The stone's composition means it's highly resistant to scratches and heat, but it also requires specific handling during installation.
The grain patterns in tan brown granite vary significantly between slabs, creating a distinctive look for each installation. Some pieces may have subtle veining while others display bold, dramatic lines. Understanding these variations helps when planning measurements and considering how the final product will look in your space.
It's also important to note that granite is a porous material. While this porosity can be beneficial for some applications, it requires proper sealing after installation to prevent staining. The natural beauty of tan brown granite comes from its unique mineral composition, including quartz, feldspar, and mica. These elements contribute to both its strength and its characteristic color variations.
Essential Tools and Materials Preparation
Before diving into the installation, gathering all necessary tools and materials is critical. You'll want to start with quality measuring equipment like a tape measure and laser distance meter for accuracy. A level is absolutely essential, as any unevenness will be immediately visible once the granite is in place.
Safety gear cannot be overstated – work gloves, safety glasses, and appropriate footwear are mandatory. For cutting and shaping, you'll need a diamond blade saw or angle grinder with a cutting wheel. A wet saw works best for precise cuts, especially around plumbing fixtures.
Other vital items include:
• Adhesive specifically designed for stone installation • Marble or granite adhesive for securing the vanity top • Grout for sealing joints • Level and straight edge for alignment • Masking tape for protecting surrounding areas • Clean rags and mild soap for cleaning
The granite itself should be measured carefully, accounting for overhangs and any special features like cutouts for sinks or faucets. Order extra material for potential waste during cutting, typically adding 5-10% to your total measurements.
Measuring and Planning Your Vanity Surface
Accurate measurement sets the foundation for successful installation. Start by measuring the width and depth of your vanity area, taking multiple readings to account for any irregularities in the space. It's helpful to measure from wall to wall, but remember to subtract the thickness of any existing cabinets or supports.
When measuring for the granite, factor in overhangs – typically 1-2 inches on each side if you want a slight extension beyond the vanity frame. This extra material creates a more finished look and provides room for minor adjustments during installation.
Consider the sink placement early in your planning phase. The granite needs to be cut precisely to accommodate the sink opening, and you'll want to ensure there's adequate clearance around the faucet and any other fixtures. Sketch out your layout before making any cuts, marking where the sink will go and how it relates to the overall design.
Don't forget to account for plumbing connections. Measure the distance between the hot and cold water lines, as well as the drain connection. These dimensions determine whether you can use your existing fixtures or need to plan for new installations.
Preparation and Safety Considerations
Proper preparation goes far beyond just measuring. Before bringing the granite into your space, clean the vanity area thoroughly. Remove any old materials, dust, and debris that could interfere with the installation process. Check that the surface is level and stable – any unevenness will become apparent once the heavy granite is placed.
Safety must always come first. Granite is heavy and can cause serious injury if dropped or mishandled. Always lift with your legs, not your back, and consider using lifting straps or having a helper available. The material is also sharp, so wear protective gear at all times.
Ensure good ventilation in the work area, especially when cutting or grinding. Dust from granite can be harmful if inhaled, so a mask or respirator is recommended. If working indoors, open windows or use fans to improve air circulation.
Set up your workspace carefully. Cover floors and surrounding areas with drop cloths to protect against spills or scratches. Plan your workflow so that you can move materials efficiently without creating unnecessary trips or obstacles.
Installing the Granite Vanity Top
Once everything is prepared, it's time to install the granite vanity top. Begin by applying a thin layer of adhesive to the top of your vanity frame. Use a notched trowel to spread the adhesive evenly, ensuring full contact between the granite and the support structure.
Carefully position the granite, starting from one end and working toward the other. Press down gently but firmly to ensure good adhesion. Check that the granite sits level and aligned with your measurements. If adjustments are needed, make small tweaks before the adhesive sets.
Use shims if necessary to correct any height differences or gaps. These small wedges can make a big difference in achieving a perfect fit. Once positioned correctly, allow the adhesive to cure according to manufacturer instructions – typically 24 hours for most products.
After the initial setting period, check for any gaps or uneven spots. Fill these with appropriate sealant or grout. The final appearance depends heavily on how well these gaps are addressed during installation.
Finishing Touches and Final Details
The finishing stage brings everything together. First, clean the granite surface thoroughly using appropriate stone cleaners. Avoid harsh chemicals that might damage the stone or its sealant coating.
Apply a high-quality sealant to protect the granite from stains and moisture. This step is crucial for maintaining the beauty and longevity of your investment. Follow the manufacturer's recommendations for application frequency, usually every 1-2 years depending on usage.
Check that all edges are properly sealed and that there are no gaps around fixtures. Trim any excess material or sealant that may have squeezed out during installation. Small imperfections can often be sanded smooth with fine-grit sandpaper, though this should be done carefully to avoid damaging the stone.
Test all fixtures to ensure they're properly aligned and functional. The sink should sit flush with the granite surface, and all hardware should be securely fastened. Take time to inspect the entire installation, looking for any areas that might need touch-ups or additional attention.
Maintenance Tips for Longevity
Proper maintenance keeps your tan brown granite vanity looking beautiful for decades. Regular cleaning with mild soap and water prevents buildup and maintains the stone's natural luster. Never use acidic cleaners like vinegar or lemon juice, as these can etch the surface.
Seal the granite annually or bi-annually, depending on usage patterns. A simple test is to place a few drops of water on the surface – if they bead up and roll off, the sealant is still effective. If the water soaks in quickly, it's time for resealing.
Avoid placing hot pans directly on the granite surface, though occasional exposure to moderate heat won't cause damage. Also, be mindful of sharp objects that could scratch the surface, especially if the granite hasn't been properly sealed.
Address spills promptly, particularly anything that might stain. Oil-based substances and red wine are particularly problematic and should be cleaned immediately. Using coasters under drinks and trivets for hot items helps preserve the granite's appearance.
Consider professional cleaning services for deep cleaning or restoration work if needed. Professional-grade products and techniques can restore the granite's original shine and remove stubborn stains that home remedies might miss.
Installing tan brown granite vanity surfaces is a rewarding project that combines practicality with aesthetic appeal. While the process requires patience and attention to detail, the results are worth every effort. From understanding the unique properties of this beautiful stone to executing each step with care, mastering the installation process opens up endless possibilities for bathroom transformation.
Remember that preparation is key – invest time in measuring accurately and gathering the right tools. Safety should never be compromised, and attention to detail during installation pays dividends in the final result. The warmth and character that tan brown granite brings to any bathroom space makes this investment truly worthwhile.
Whether you're doing this project yourself or hiring professionals, understanding the basics gives you confidence in making informed decisions. With proper care and maintenance, your tan brown granite vanity will continue to provide beauty and functionality for many years to come. The journey from measurement to installation may seem daunting, but with the right approach, anyone can achieve professional-looking results that enhance their home's value and appeal.


Related Posts
How Ceramic Vessel Sinks Enhance Bathroom Aesthetics and Functionality
How to Choose the Right Wall Mounted Corner Sink for Your Bathroom Space
Design and Durability Analysis of the Kingston Brass GLTS37225 Brushed Basin
Transforming Your Bathroom with Textured Stone Surfaces
Choosing the Perfect Small Undermount Sink for Your Home Decor