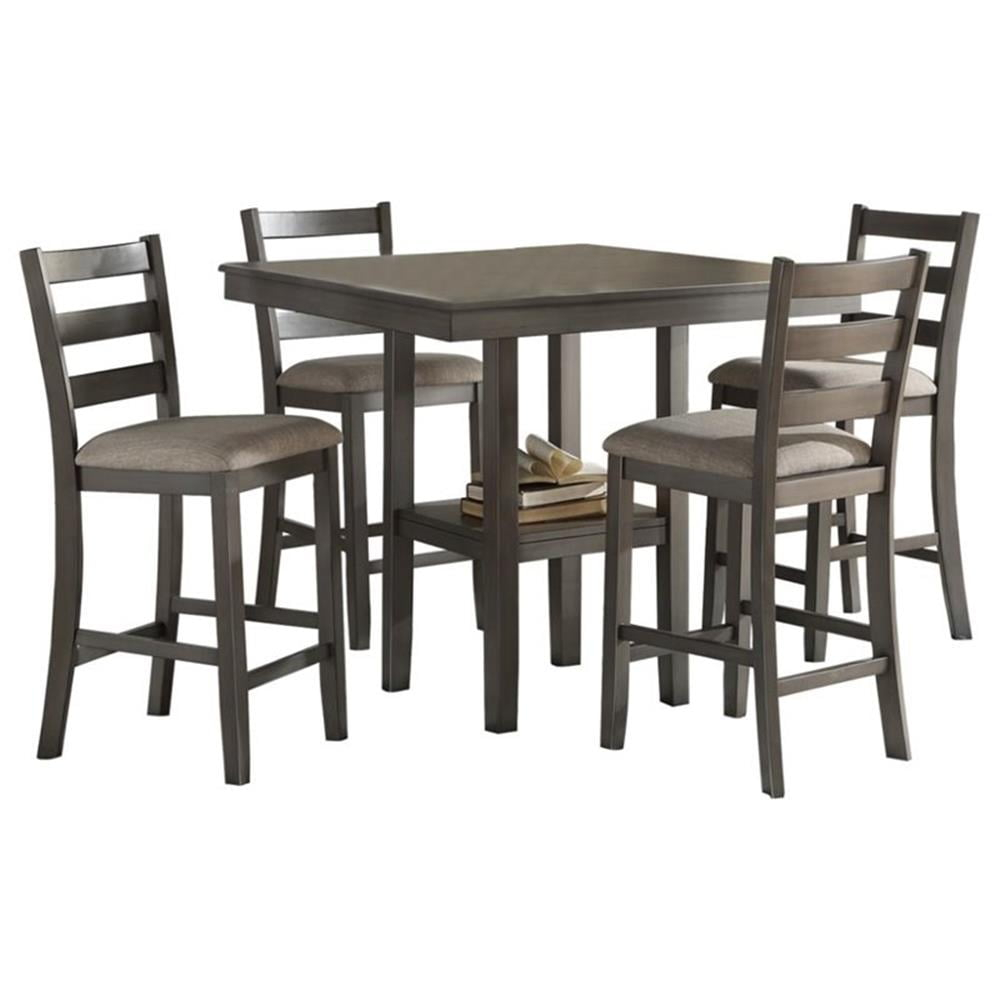
So, you've got your hands on the stylish Lexicon Sharon Counter Height Set, and now it's time for the fun part: putting it all together. While the idea of furniture assembly can sometimes feel daunting, with a little patience and the right approach, you'll have your beautiful new set ready to enjoy in no time. This isn't just about following instructions; it's about understanding the pieces and creating a functional and attractive addition to your home. Let's dive in and make this process as straightforward and enjoyable as possible.
Congratulations on choosing the Lexicon Sharon Counter Height Set! It’s a fantastic choice for adding a touch of modern elegance and practical seating to your kitchen or dining area. You might be looking at the box with a mix of excitement and a hint of 'uh oh, how do I do this?' I get it. We've all been there, staring at a pile of parts and a booklet that looks like a secret code. But don't worry. This guide is designed to demystify the assembly process, offering clear, actionable advice that makes sense. We'll walk through each step, anticipating common hiccups and sharing insights that will help you build your set with confidence and ease. Think of this as your friendly co-pilot for furniture assembly.
Before You Begin: Preparation is Key
Before you even think about unscrewing a single bolt, let’s get organized. This initial prep work can save you a lot of frustration down the line.
- Unpack Everything: Carefully open the box and lay out all the parts. Try to keep them contained in one area, maybe on a drop cloth or the cardboard packaging itself to protect your floor and the furniture pieces.
- Check the Inventory: Grab the instruction manual and meticulously compare every piece and hardware item against the parts list. Make sure nothing is missing or damaged. If something isn't right, it's much easier to address it now by contacting customer service than halfway through assembly.
- Gather Your Tools: Most furniture kits come with basic tools, but having your own set can make a big difference. You'll likely need a Phillips head screwdriver and possibly a rubber mallet. A power drill with a clutch setting can speed things up, but be very careful not to overtighten screws, as this can strip the wood or damage the hardware.
- Read the Instructions (Really!): I know, I know, but seriously, take a few minutes to read through the entire manual before you start. This gives you a general overview of the process and helps you anticipate upcoming steps. Pay attention to any warnings or special notes.
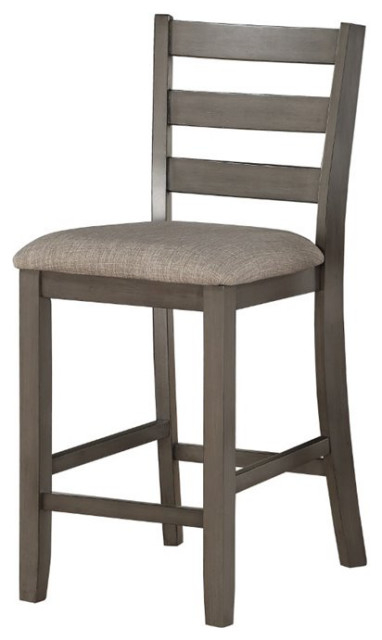
Assembling the Counter Height Chairs: A Detailed Look
The chairs are often the most intricate part of a set like this. Let’s break down the typical assembly steps.
Attaching the Legs
Usually, you'll start by attaching the legs to the seat base.
- Identify Leg Orientation: Make sure you're attaching the legs correctly. Sometimes, there are front and back legs that are slightly different. Look for any labels or subtle shape differences.
- Secure with Hardware: Use the provided screws and washers. Don't fully tighten them just yet. Leave them a little loose so you have some wiggle room for aligning other parts.
Connecting the Stretcher Bars
Many counter height chairs have stretcher bars or supports between the legs for added stability.
- Alignment is Crucial: This is where leaving the leg screws slightly loose comes in handy. It allows you to maneuver the legs to fit the stretcher bars into their designated slots or holes.
- Tighten Gradually: Once all the stretcher bars are in place, you can start to tighten the leg screws. Work your way around, tightening each screw a little at a time, rather than fully tightening one before moving to the next. This ensures even pressure and a stable build.
Adding the Seat Cushion (If Applicable)
If your chairs have separate seat cushions, they usually attach last.
- Velcro or Screws: Check if they attach with Velcro strips on the underside or if they are secured with screws. Follow the manual's specific instructions for this step.
Tip: It’s a good idea to have someone help you hold the chair steady while you attach the legs and stretchers. Two sets of hands are often better than one, especially for the chairs.
Assembling the Counter Height Table: Stability and Style
The table assembly might seem simpler, but stability is paramount here.
Attaching the Legs to the Tabletop
This is usually the core of the table assembly.
- Tabletop Placement: Place the tabletop upside down on a soft surface (like a blanket or the cardboard from the box) to prevent scratches.
- Leg Attachment Points: Locate the pre-drilled holes or mounting brackets for the legs. Each leg will have a specific place and orientation.
- Secure the Legs: Use the provided bolts, washers, and nuts. Again, don't fully tighten them immediately. This allows for minor adjustments as you attach all the legs.
Installing the Support Structure (If Any)
Some tables have an additional support frame or crossbars that connect the legs beneath the tabletop.
- Follow the Diagram: These pieces are critical for the table's sturdiness. Ensure you're using the correct hardware and that the supports are facing the right direction as shown in the manual.
- Gradual Tightening: Similar to the chairs, once all legs and support structures are loosely attached, begin tightening all the hardware. Work in a star pattern (tighten one bolt, then the one opposite it) to ensure the pressure is distributed evenly.
Final Tightening and Inspection
Once all components are in place and loosely connected, go back and fully tighten all screws and bolts.
- Test for Wobble: Gently try to rock the table. If it wobbles, check that all fasteners are tight and that the legs are properly seated. Sometimes, a slight re-tightening or loosening of a specific leg can resolve minor wobbles.
- Flip and Admire: Carefully flip the table upright. Now it’s ready for its final inspection.
Common Pitfalls and How to Avoid Them
Even with the best intentions, assembly can sometimes hit a snag. Knowing these common issues can help you sidestep them.
- Overtightening: This is a big one. Screwing too hard can strip the threads, crack the wood, or deform the hardware. Always use the correct tool and apply firm, steady pressure without forcing it. If using a power drill, set it to a low torque setting.
- Misidentifying Parts: Make sure you’re using the right screw or bolt for the right hole. They often look similar but have slight differences in length or thread pattern. Double-check the manual’s diagrams.
- Forcing Pieces Together: If parts aren't fitting easily, don't force them. Stop and re-examine the instructions and the orientation of the pieces. You might have a piece backward or upside down.
- Skipping Steps: It might be tempting to jump ahead, but each step is usually designed to build upon the previous one. Follow the sequence carefully.
- Assembling on an Uneven Surface: This can lead to a wobbly final product. Ensure you’re working on a flat, stable area.
Remember, patience is your best tool here. If you get stuck, take a short break, clear your head, and then revisit the problem with fresh eyes. Sometimes, a quick look at an online video tutorial for a similar set can offer visual clarification.
Maintenance and Care for Longevity
Once your Lexicon Sharon Counter Height Set is assembled, you'll want to keep it looking its best for years to come.
- Regular Cleaning: Wipe down the surfaces regularly with a soft, damp cloth. For tougher spots, a mild soap and water solution can be used, followed by a thorough drying. Avoid abrasive cleaners or harsh chemicals that can damage the finish.
- Tighten Hardware Periodically: Over time, with regular use, screws and bolts can loosen slightly. It’s a good idea to give your chairs and table a quick check every few months and tighten any loose fasteners. This is crucial for maintaining stability and preventing wear and tear.
- Protect Surfaces: Use coasters under drinks and placemats or a tablecloth during meals to protect the tabletop from scratches, heat, and moisture.
- Avoid Direct Sunlight: Prolonged exposure to direct sunlight can cause the finish to fade or degrade. If possible, position your furniture away from direct sunbeams.
- Address Spills Immediately: Don't let spills sit on the surfaces. Wipe them up promptly to prevent staining or damage to the material.
Enjoying Your Newly Assembled Set
And there you have it! Your Lexicon Sharon Counter Height Set is now fully assembled and ready to be the heart of your home. Imagine gathering with friends and family around this stylish new centerpiece. It’s more than just furniture; it’s a space for connection, laughter, and making memories. The satisfaction of building something yourself, and doing it well, is a great feeling. Now, pour yourself a drink, sit back, and admire your handiwork. You earned it! Whether it's a casual breakfast, a lively dinner party, or just a quiet moment with a cup of coffee, your new set is ready to host it all.
Assembling your Lexicon Sharon Counter Height Set might have seemed like a challenge at first, but by breaking it down into manageable steps and approaching it with a bit of preparation and patience, you’ve successfully created a beautiful and functional addition to your home. Remember the key takeaways: organize your parts, follow the instructions carefully, don't overtighten, and take your time. The result is a durable and stylish set that you can enjoy for many meals and moments to come. Happy assembling, and more importantly, happy enjoying!