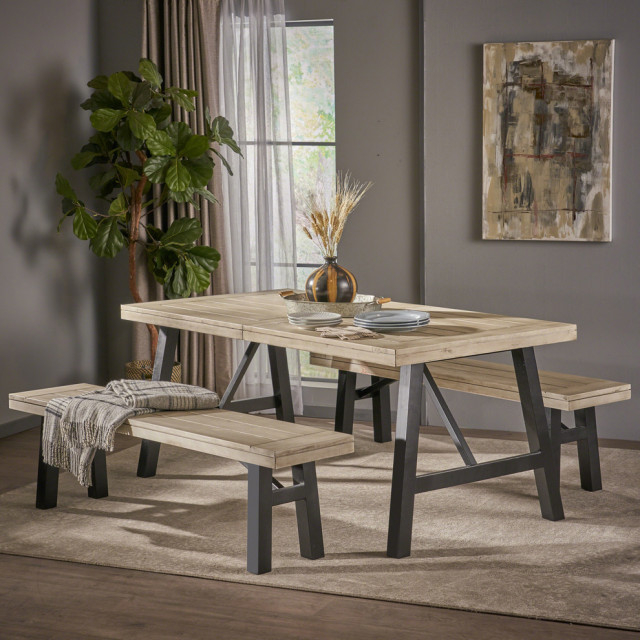
So, you've got your brand new GDF Studio Amaya Picnic Set, and you're probably eager to start planning those al fresco dining adventures. But before you can pack it with goodies and head to the park, there's a little bit of putting together involved. Don't worry, though. This isn't rocket science, and with a little patience, you'll have your charming picnic set ready to go in no time. This guide is here to make the process as smooth and straightforward as possible, so you can focus on the fun part: enjoying the great outdoors.
There's something truly special about a picnic, isn't there? The fresh air, the delicious food, and the company – it all adds up to a perfect day. The GDF Studio Amaya Picnic Set is designed to make these moments even more enjoyable and stylish. But like any great piece of furniture, it needs a little assembly. We've broken down the process into easy-to-follow steps, so whether you’re a DIY novice or a seasoned pro, you’ll be able to put your picnic set together without a hitch. Let's dive in and get this done!
Before You Begin: What's in the Box?
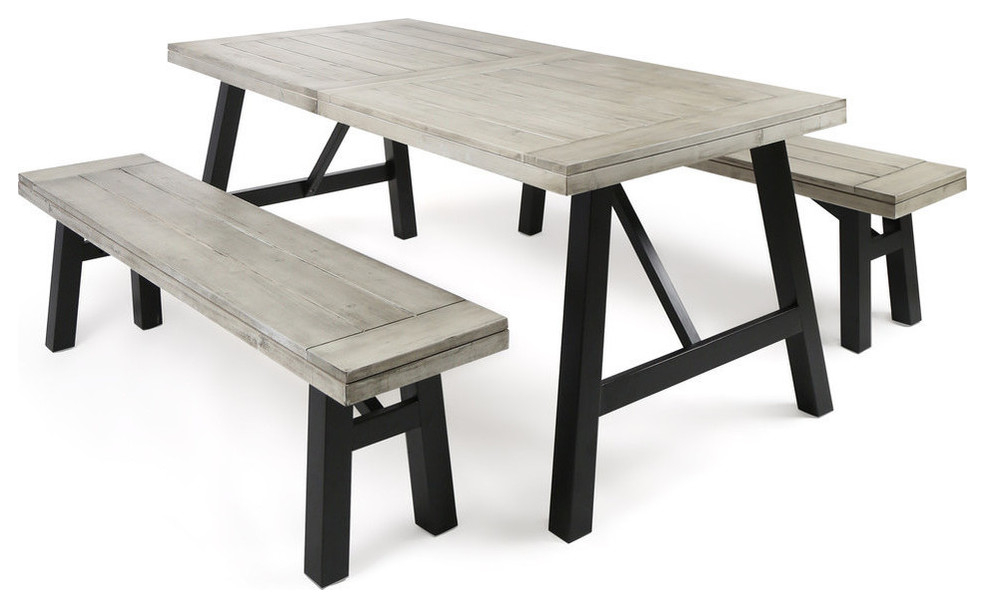
First things first, let's make sure you have everything. Carefully unpack all the components from the box. You'll likely find the tabletop, the folding legs, the seat components, and perhaps some hardware like screws or bolts. It's a good idea to lay everything out on a clean, soft surface – maybe a blanket or the cardboard from the packaging – to avoid scratches. Check the included instruction manual to confirm you have all the parts listed. If anything seems to be missing or damaged, don't hesitate to contact customer support. It’s better to sort this out now than when you’re halfway through assembly.
Step 1: Assembling the Tabletop and Legs
The table is usually the most straightforward part. You'll probably notice pre-drilled holes on the underside of the tabletop and on the legs. Align the legs with these holes. Most GDF Studio sets use bolts or screws for this. You might need a screwdriver or a small wrench, which is often included. Gently insert the hardware and begin to tighten. Don't overtighten just yet. Once all the legs are loosely attached, you can go back and secure them firmly. Make sure the legs are flush against the tabletop for stability. Give it a little wobble test to ensure it’s secure.
Step 2: Putting Together the Seats
Now for the seating. The Amaya set typically includes bench-style seats. These might come in a few pieces: the seat base and the backrest, and perhaps some support braces. Again, look for pre-drilled holes and corresponding hardware. You’ll likely need to attach the backrest to the seat base. Sometimes, there are also side panels or supporting pieces that connect the legs to the seat. Follow the diagrams provided in your manual closely here. It’s important that the seats are sturdy and level. If your set has separate legs for the seats, assemble those first, then attach them to the seat base and backrest.
Step 3: Connecting Seats to the Table (If Applicable)
Some picnic sets have seats that are integrated or attach directly to the table structure, while others are freestanding. If your Amaya set has seats that fold out from the table, this step will involve securing those folding mechanisms. Ensure that the hinges or connection points are properly aligned and tightened. If the seats are separate, you might just need to ensure they are positioned correctly relative to the table for the intended design. For the Amaya set, it's common for the seats to fold neatly underneath the table for storage, so check how those hinges work.
Step 4: Final Checks and Tightening
Once everything is loosely assembled, it's time for the final tighten. Go around and make sure every screw, bolt, and connection is snug and secure. This is crucial for the safety and longevity of your picnic set. Give the entire structure a good shake and a gentle push. Does it feel solid? Are there any wobbly bits? If so, identify the loose connection and tighten it. Also, check that all the folding mechanisms operate smoothly. You don't want anything sticking or catching when you're trying to set up for a picnic.
Step 5: Ready for Your First Picnic!
Congratulations! You’ve successfully assembled your GDF Studio Amaya Picnic Set. It’s now ready to be the centerpiece of your outdoor gatherings. Think about where you’ll keep it when it’s not in use – the foldable design makes it pretty easy to store. Before your first outing, maybe give it a quick wipe down. And then, it’s time to pack that basket and enjoy the fruits of your labor in the sunshine. Happy picnicking!
Putting together your GDF Studio Amaya Picnic Set might seem a bit daunting at first, but as you can see, it’s a manageable task. By following these steps and paying attention to the details, you’ll have a beautiful and functional picnic set ready for countless memories. Remember, the goal is to enjoy the process and the outcome. So, take your time, refer to your manual, and soon you’ll be enjoying your meals outdoors in comfort and style. Happy adventuring!