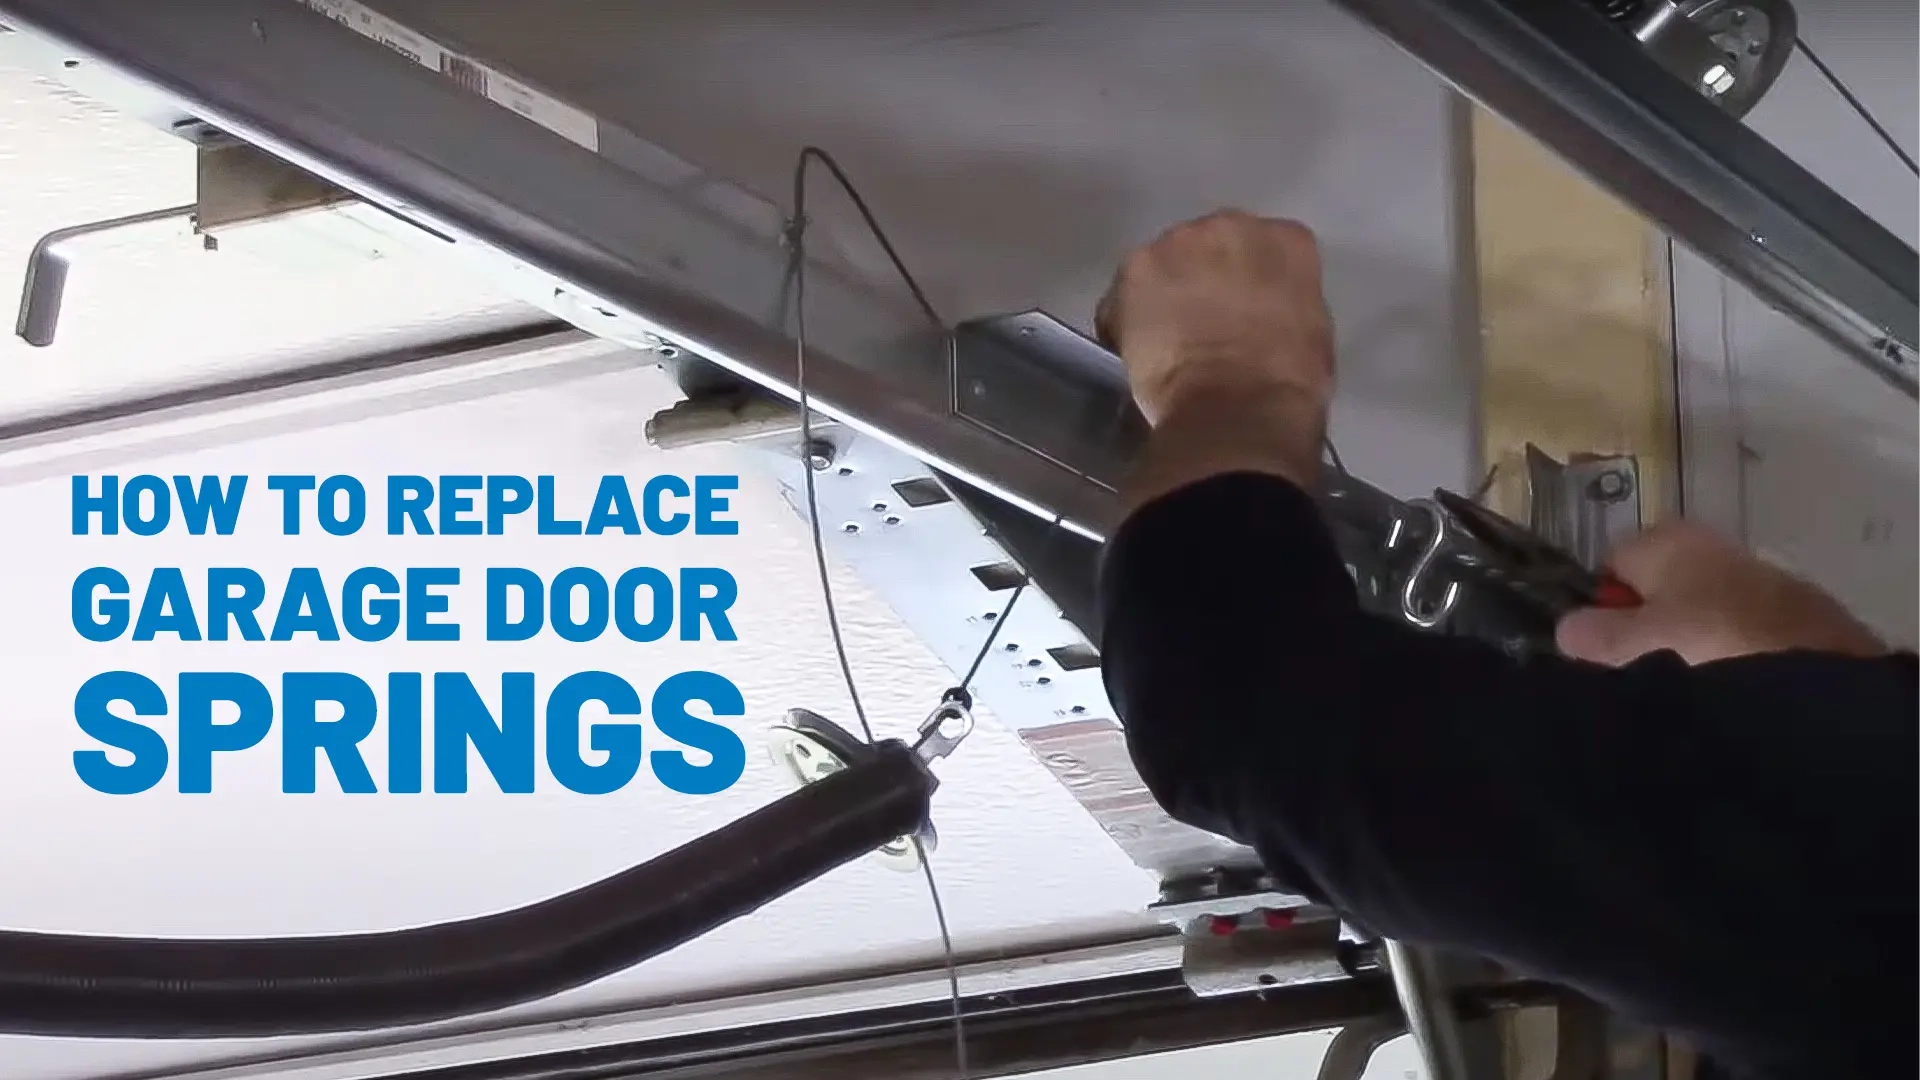
When your garage door isn't opening smoothly or makes strange noises, it might be time to replace those springs. But before you start, you'll want to know exactly how to do it right. Whether you're tackling this project yourself or hiring someone, understanding the basics can save you time, money, and potential injuries.
Garage doors are workhorses of our homes, opening and closing thousands of times each year. The springs inside them take all that stress and keep everything running smoothly. But when they break or wear out, the whole system can go haywire. You might notice your door feels heavy, opens unevenly, or makes loud clanking sounds. That's when it's time to think about spring replacement. The good news? With the right approach, most people can handle this job themselves. The key is knowing what you're doing and following some basic rules.
Understanding Your Spring System
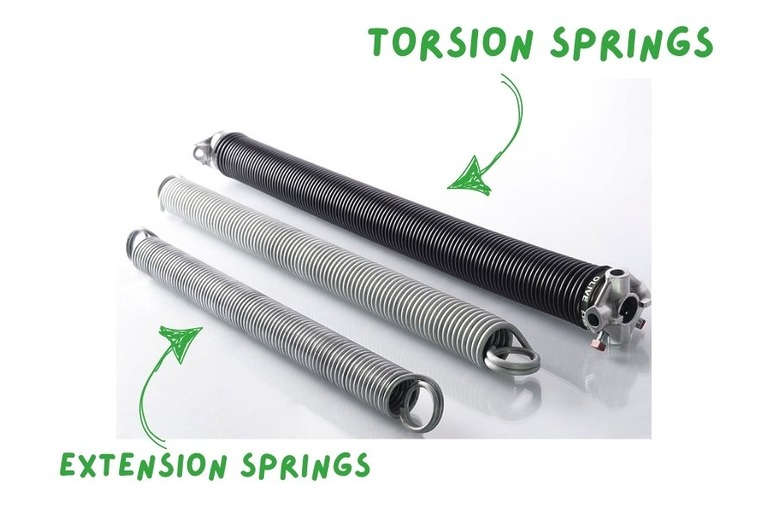
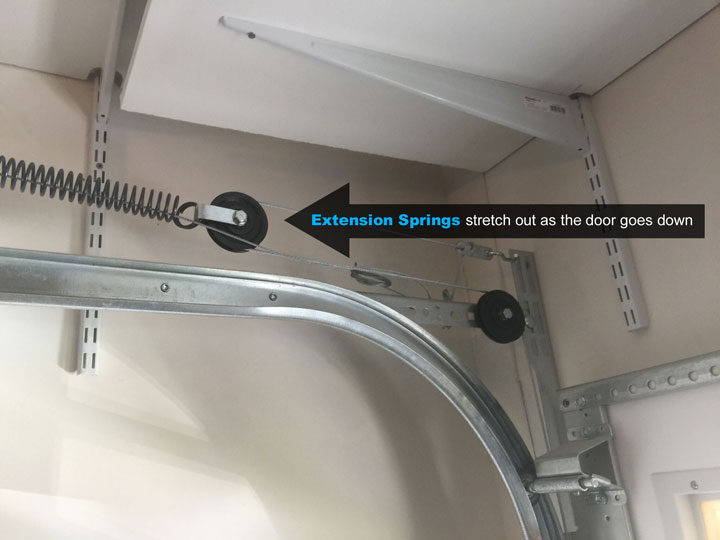
Before diving into installation, it's important to know what you're working with. There are two main types of garage door springs: torsion and extension. Torsion springs sit above the door track and work by twisting. Extension springs live on the side tracks and stretch out when the door opens. Each type requires different installation methods and safety considerations. Think of torsion springs like a twisted rubber band - they store energy by rotating. Extension springs act more like a stretched rubber band, pulling back when released. Understanding these differences helps you prepare properly. Most residential garage doors use one of these systems, sometimes both. If you're unsure which type you have, look at the location and shape of the springs. Torsion springs are usually mounted horizontally above the door, while extension springs run along the sides of the track. Either way, they're under high tension and require caution.
Safety First: Critical Precautions
This is where many DIYers make their biggest mistake. Garage door springs carry tremendous force - enough to cause serious injury if they suddenly release. Always disconnect the power source first, then remove the emergency release cord. This simple step prevents accidental movement during installation. Wear protective gear including gloves, safety glasses, and closed-toe shoes. These aren't luxuries - they're necessities. Also, make sure you have proper lighting. Working in dim conditions increases risk significantly. Don't attempt this project if you're feeling rushed or tired. Your judgment gets clouded when you're not fully alert. Some people prefer to hire professionals for this part because the risks are real. It's okay to admit when something is beyond your comfort zone. Remember that even experienced installers often need help with the heaviest components. Safety always comes first.
Gathering Your Tools and Materials
Having everything ready before you start saves time and frustration. You'll need a few basic items: a socket wrench set, pliers, screwdrivers, and possibly a spring compressor tool. These tools help manage the tension safely. Measure twice, cut once - literally. Bring a tape measure to confirm spring specifications match your old ones. Check the manufacturer's label on the old spring for exact measurements. Some springs are marked with numbers indicating their strength. These numbers tell you how much weight they can handle. Buy springs that match exactly what you had before. Using incorrect springs can damage your door mechanism or create safety hazards. Consider getting extra springs just in case. They're relatively cheap compared to professional repair costs. Also, have some lubricant handy for moving parts after installation. A good quality garage door lubricant works wonders for smooth operation.
Preparing the Door for Installation
Getting your garage door ready means more than just turning off the electricity. Remove any items from the door area that could get in the way. Clear the floor space around the door completely. Set up a stable work surface if needed. You might need to prop the door open using a sturdy block or lever. This keeps it from falling shut during installation. If you're replacing torsion springs, you'll need to remove the door from its tracks temporarily. For extension springs, you may be able to work on the door while it's hanging normally. Always check that your workspace is clean and well-lit. A cluttered environment leads to accidents. Make sure the door won't move unexpectedly during the process. Having a helper nearby can make this much safer and easier. Sometimes a second person can hold the door steady while you work on the springs.
Installing Torsion Springs Correctly
Torsion springs are trickier but more common in modern doors. Start by removing the old spring carefully, noting how it sits on the shaft. The new spring must go on exactly the same way. Pay attention to the direction of twist - it matters. Most torsion springs have arrows or markings showing rotation direction. You'll need to wind the spring around a special shaft, usually located above the door. This process involves careful measurement and winding. Don't over-tighten - too much tension causes problems later. Use a spring compressor tool if available. It holds the tension safely while you work. The shaft should be positioned correctly, with the spring sitting properly in its mounting brackets. When everything looks right, slowly release the compressor tool. Test the door movement gently to ensure it operates smoothly. Listen for unusual sounds or jerky movements. If anything seems off, double-check your alignment.
Extension Spring Installation Best Practices
Extension springs are generally easier for beginners to handle. These springs connect directly to the door and track system. Begin by removing the old springs from their mounting points. Take note of how they attach to the door and track. New springs must be installed exactly the same way. Make sure the hooks on the springs fit securely into the mounting brackets. Don't skip this step - loose connections lead to dangerous situations. Check that the springs are properly aligned with the door's travel path. They shouldn't rub against anything during operation. When installing multiple springs, ensure they're evenly tensioned. One spring tighter than another creates imbalance and wear. Use a spring scale if you have one to test tension levels. Finally, test the door's operation after installation. Make sure it moves smoothly and stops properly at both ends. If you hear grinding or squeaking sounds, something needs adjustment.
Testing and Final Adjustments
Once installation is complete, it's time to test everything. Open and close the door several times slowly. Watch for any unusual movement or noise. The door should rise and fall smoothly without jerking. Check that it stops properly at the top and bottom positions. If it goes too far or stops short, adjustments may be needed. Look for signs of misalignment in the tracks or springs. Any binding or rubbing indicates a problem. Lubricate all moving parts thoroughly. This includes the springs, rollers, and hinges. Clean any debris from the tracks first. Apply lubricant sparingly - too much attracts dirt. Make small adjustments as needed. Don't try to fix major problems yourself unless you're confident. Some issues require professional attention. If the door still operates strangely after testing, consider calling a technician. Remember, a properly functioning garage door is both convenient and safe.
Common Mistakes to Avoid
Even experienced hands can make errors during installation. One frequent mistake is not checking spring specifications carefully. Using the wrong size or strength can cause immediate problems or long-term damage. Another common error is rushing the process. Taking shortcuts may seem faster, but it leads to mistakes. Not properly securing the springs before releasing tension is extremely dangerous. Many people forget to test the door after installation. Skipping this final step can result in serious safety issues. Over-tightening springs creates additional stress on the entire system. Under-tightening allows the door to operate poorly. Neglecting to lubricate moving parts means premature wear. Finally, ignoring warning signs like unusual noises or binding during operation. These symptoms indicate problems that need addressing immediately. Learning from others' mistakes helps you avoid them.
When to Call a Professional
There are situations where professional help is clearly better than attempting a DIY solution. If you're uncomfortable handling the tension involved, don't hesitate to call a technician. Some older garage doors have complex spring systems that require specialized knowledge. If you're dealing with heavy commercial doors or unique designs, experts have the experience needed. Signs that indicate professional service include persistent binding, unusual noises, or door imbalance. These issues might stem from more than just spring problems. Sometimes track misalignment or worn rollers cause similar symptoms. Professionals can diagnose and fix underlying problems quickly. They also provide warranties on their work, giving you peace of mind. Don't let pride prevent you from choosing safety. A few hundred dollars for professional service is often cheaper than costly repairs from mistakes.
Maintenance Tips for Longevity
Proper care extends spring life significantly. Regular lubrication prevents rust and wear. Check springs monthly for signs of damage or fatigue. Look for cracks, corrosion, or broken wires. Replace springs proactively rather than waiting for failure. Most springs last 10-15 years with good maintenance. Keep the door tracks clean and free from debris. Remove dirt, leaves, and other materials regularly. Inspect rollers and hinges frequently. Worn parts cause extra strain on springs and other components. Schedule annual professional inspections if possible. Technicians can spot issues before they become serious problems. Simple things like cleaning the door tracks and lubricating moving parts make a big difference. These tasks take minutes but extend your door's life dramatically. Remember that prevention beats repair every time.
Installing garage door springs isn't rocket science, but it does require attention to detail and safety. Whether you choose to tackle it yourself or hire help, understanding the basics gives you confidence and control. The key elements are preparation, safety awareness, proper tools, and careful execution. Most importantly, don't rush the process. Taking your time pays dividends in safety and performance. When done correctly, new springs will restore smooth operation to your garage door. Regular maintenance afterward keeps everything running smoothly. If you ever feel uncertain, remember that professional help is always available. Your safety and the longevity of your garage door matter more than any DIY pride. With the right approach, this project becomes manageable and rewarding. The satisfaction of fixing something yourself is worth the effort.